Forex Trading QuickStart Guide contains numerous trading charts, many of them depicting real-world trading scenarios. The charts in this book will often feature price action dynamics depicted in their entirety, from one end to the other, all at once. However, as author Troy Noonan often notes, real traders always experience their trades on “the right edge of the chart,” without knowing what’s going to come next.
That's why we created this visualization tool for Forex Trading QuickStart Guide readers. With this tool, you can view the many charts contained and explained within Forex Trading QuickStart Guide from the perspective of a real trader watching the price action develop from “the right edge of the chart.”
This tool is especially useful in the "In The Trading Room" Chapters (Ch 10, 12, and 14), though we’ve included essentially all the charts contained in the entire book (81 in total divided among two pages) for you to explore.
THIS IS PAGE 1 OF 2.
PAGE 1 CONTAINS "IN THE TRADING ROOM" CHARTS.
PAGE 2 CONTAINS "OTHER CHARTS" TO SEE PAGE 2, PLEASE CLICK HERE
The charts below utilize a slider. To use the slider, simply click and drag the slider across the chart to see how the charts would progress in real time.
Chapter 10: Applying the SMA Indicators (In the Trading Room)
Using the 20 SMA on a 5-Minute Chart
Figure 50, page 158
Using the 20 SMA on a 15-Minute Chart
Figure 51, page 161

Figure 52, page 164
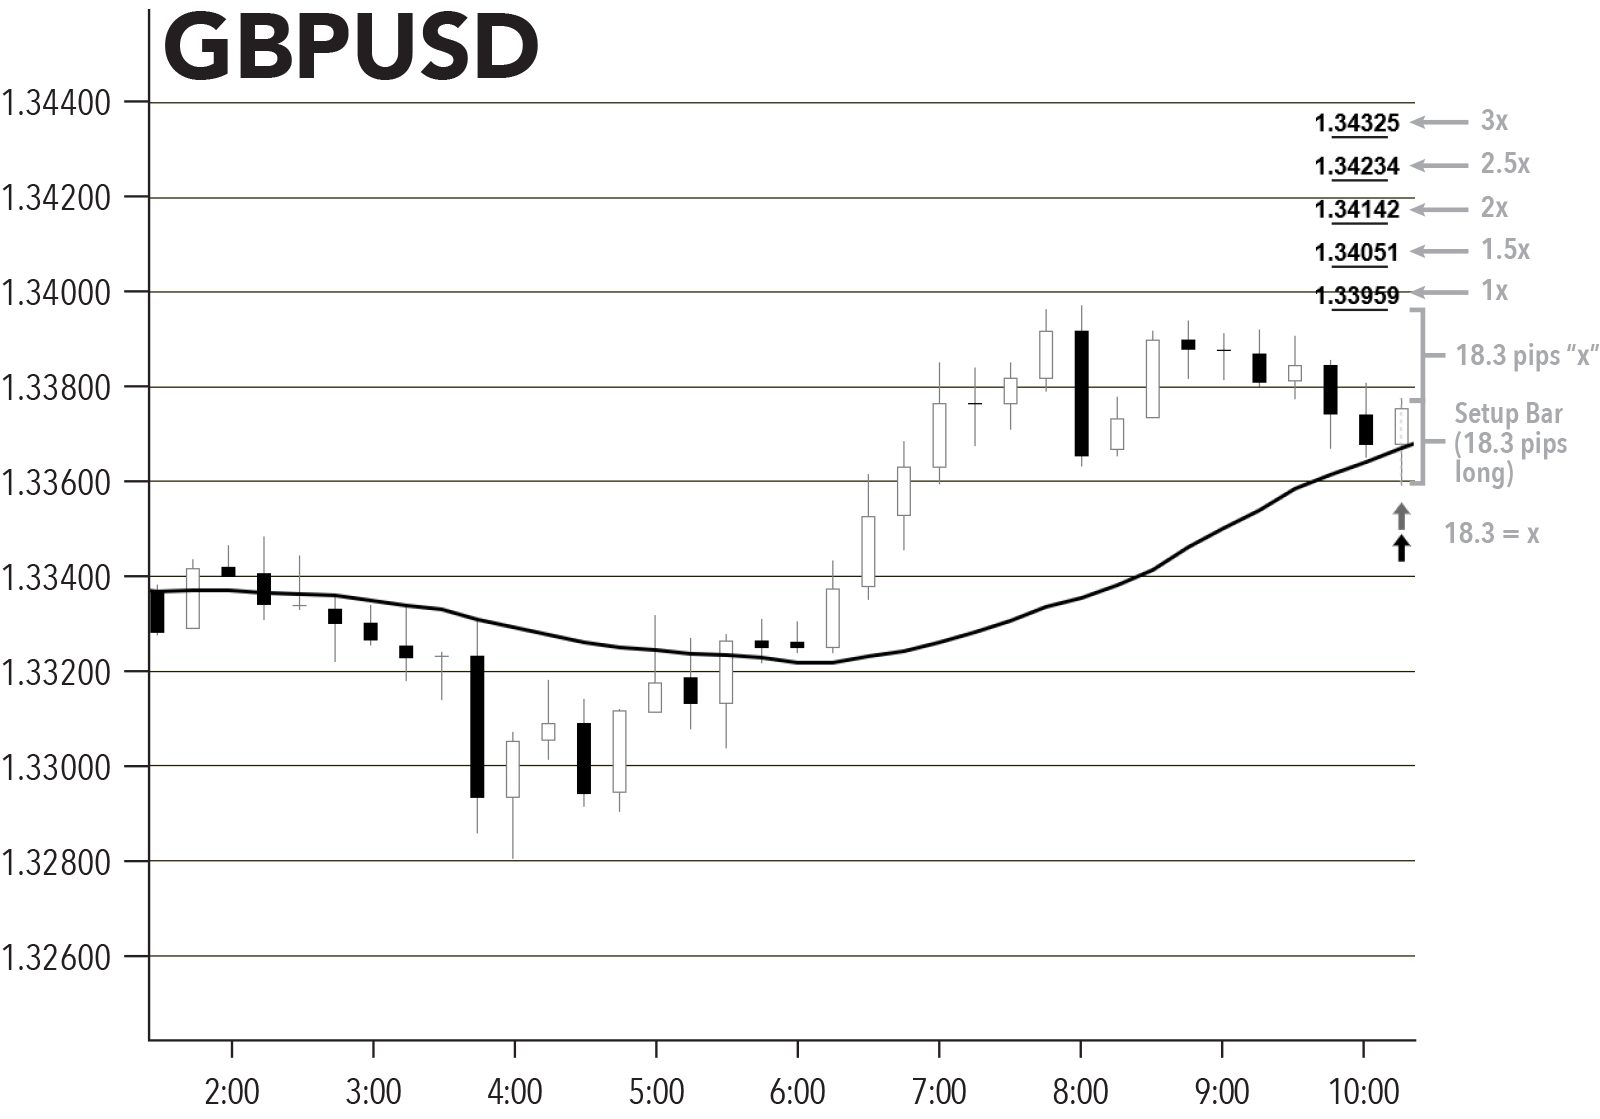
Figure 54, page 166
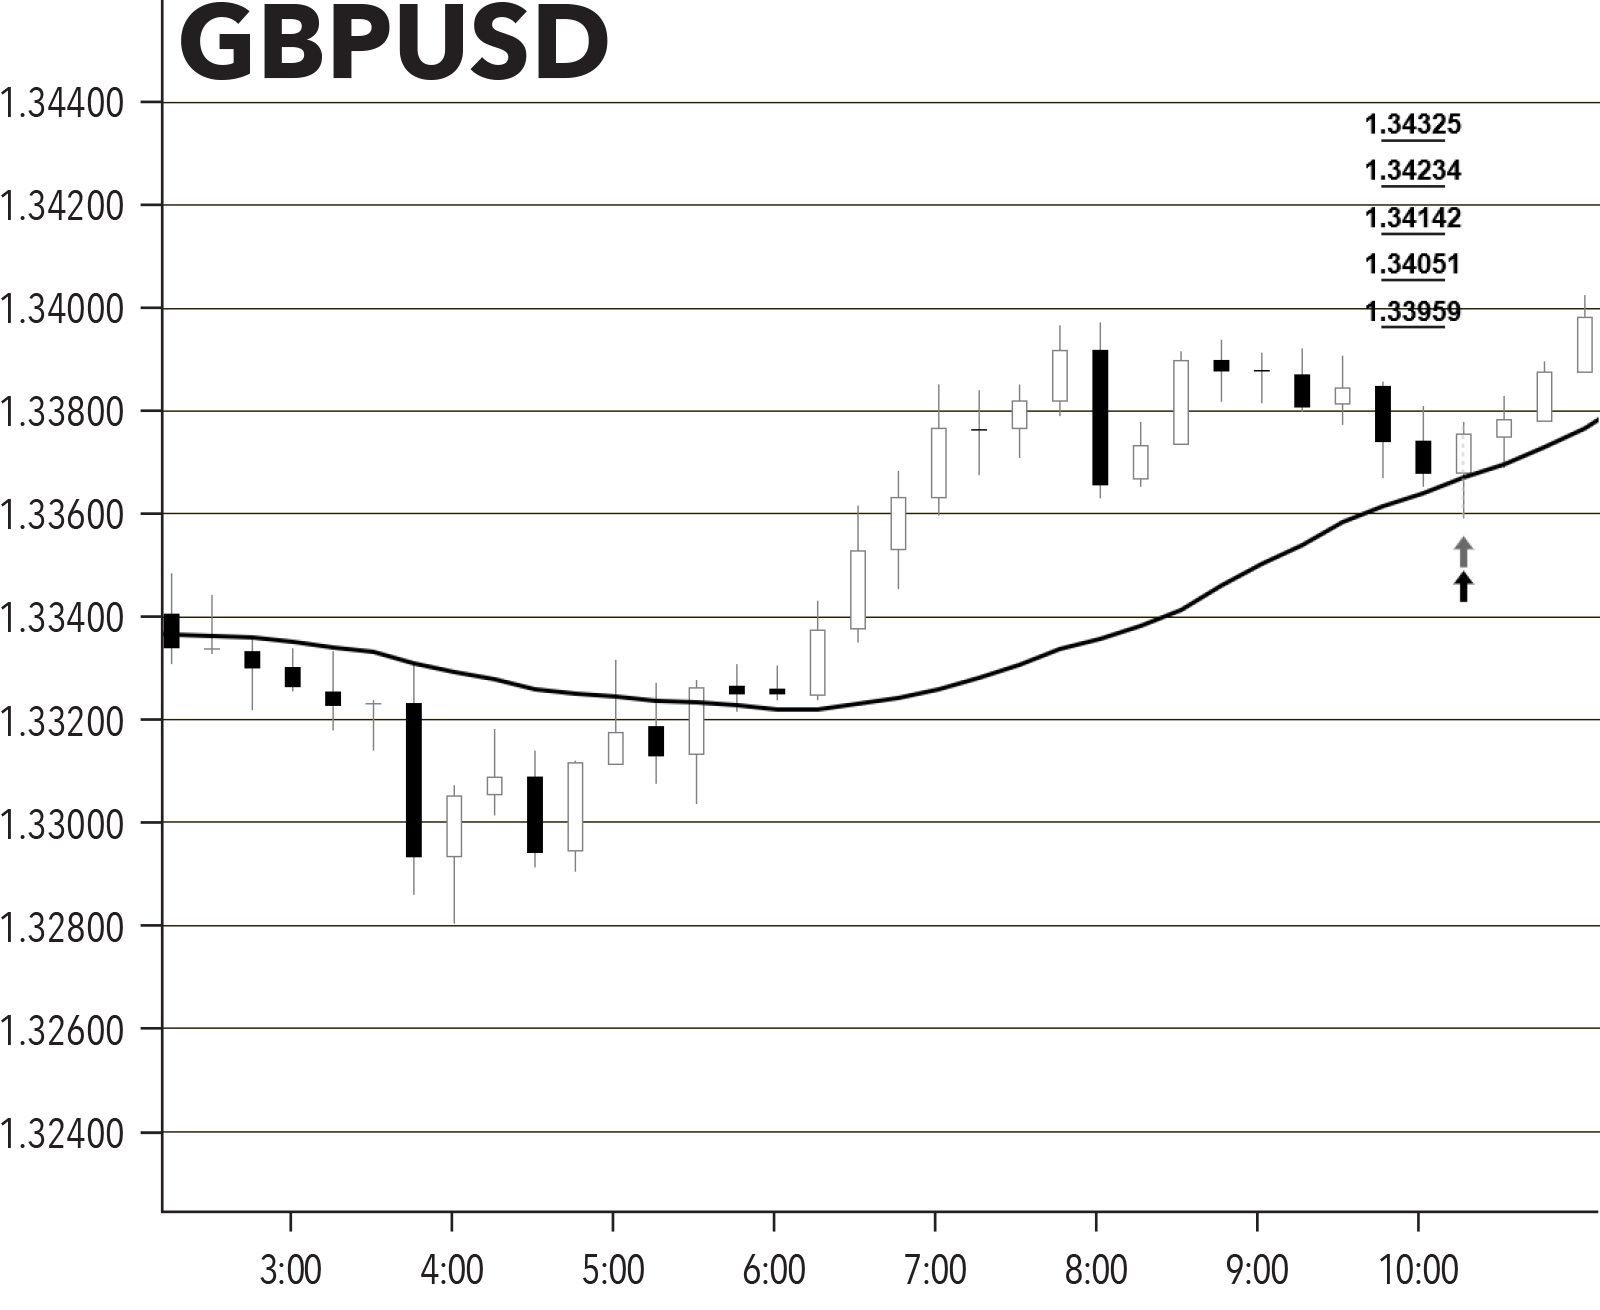
Figure 55, page 166
Figure 56, page 168
Figure 57, page 169

Figure 58, page 171
Figure 59, page 171

Figure 60, page 172
Figure 61, page 173
Figure 62, page 174
Figure 63, page 175
Figure 64, page 176
Chapter 12: Using Dynamic Systems (In the Trading Room)
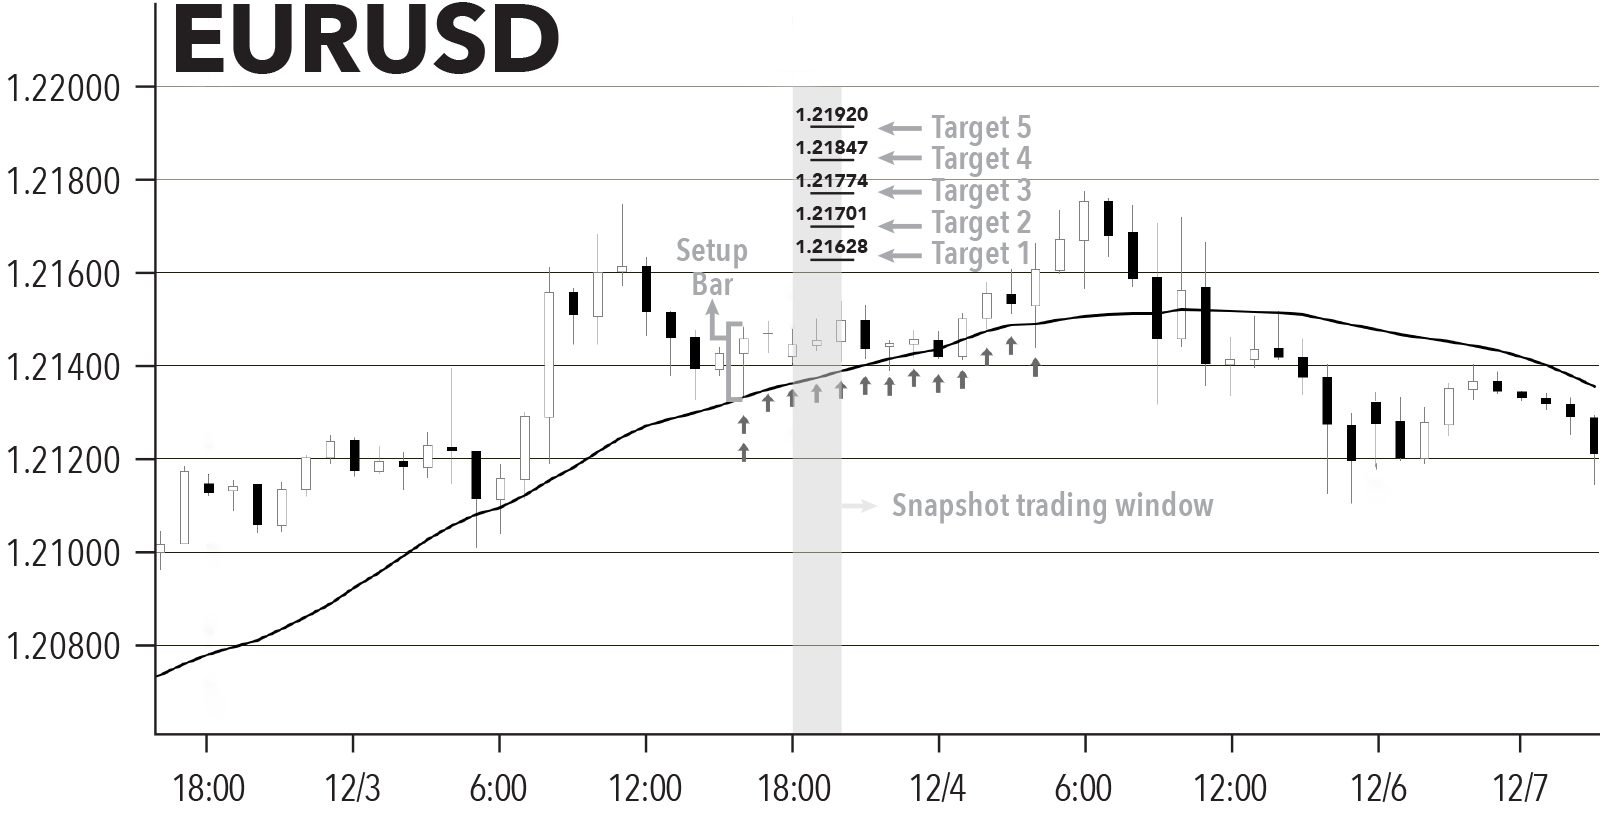
The Snapshot Trading Technique
Figure 65, page 187
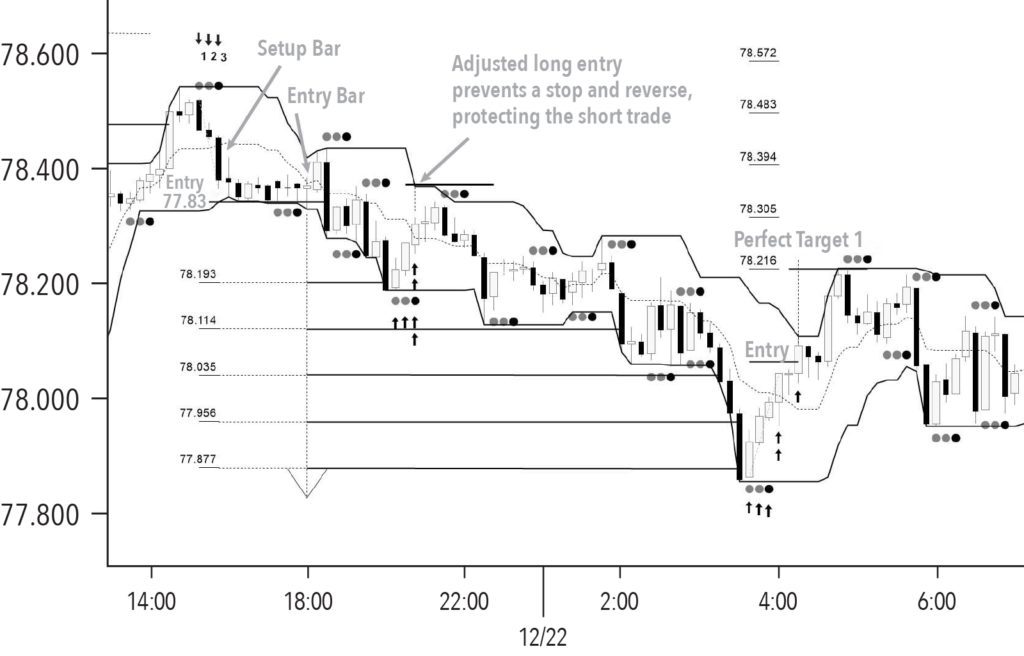
The 1-2-3 Setup
Figure 69, page 193
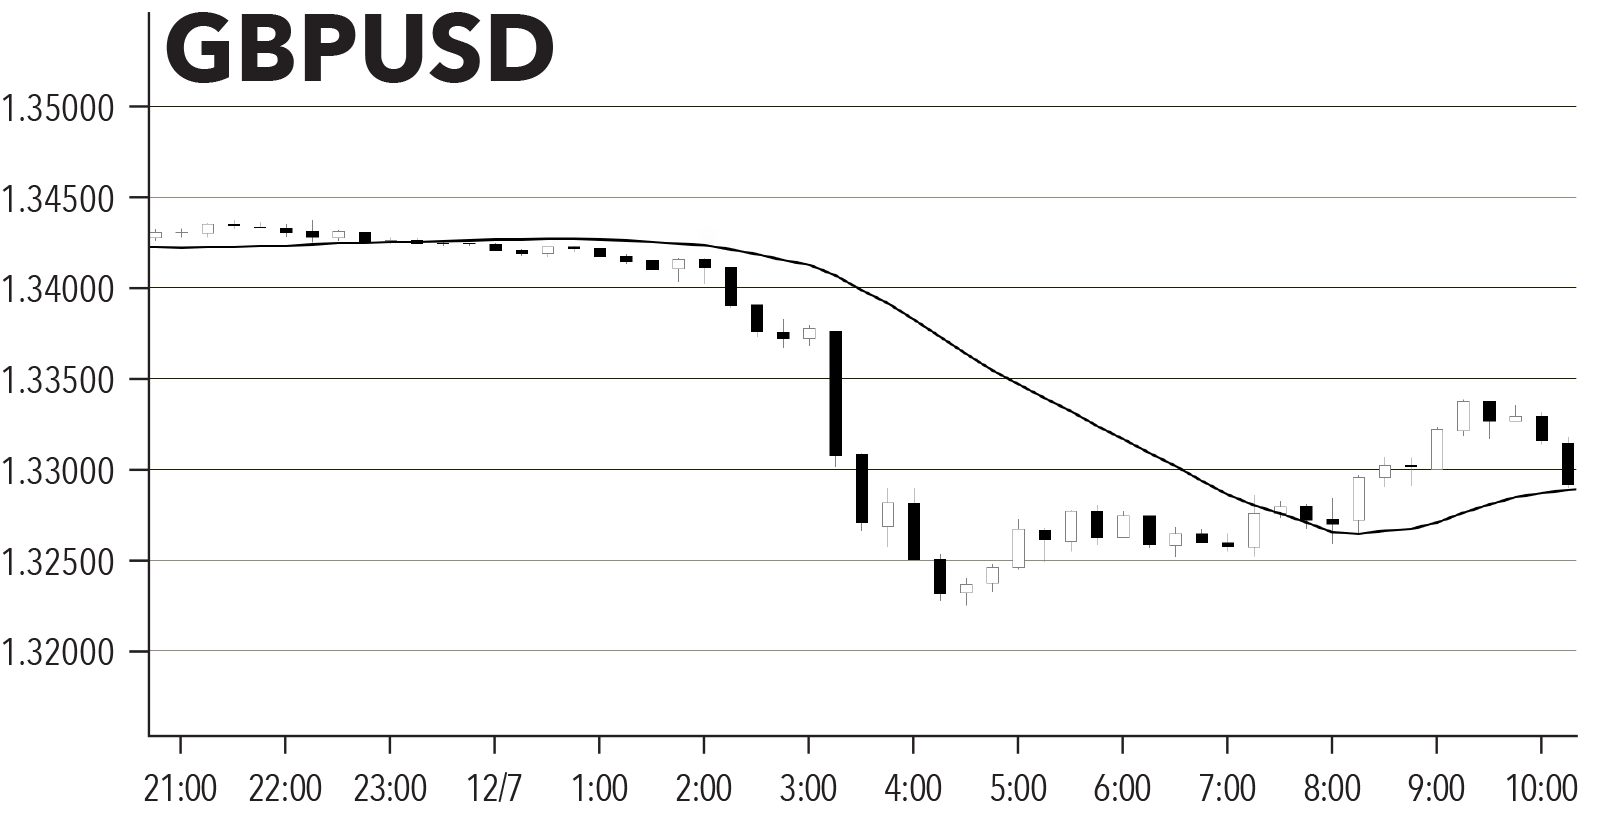
Figure 70, page 194

Figure 71, page 195
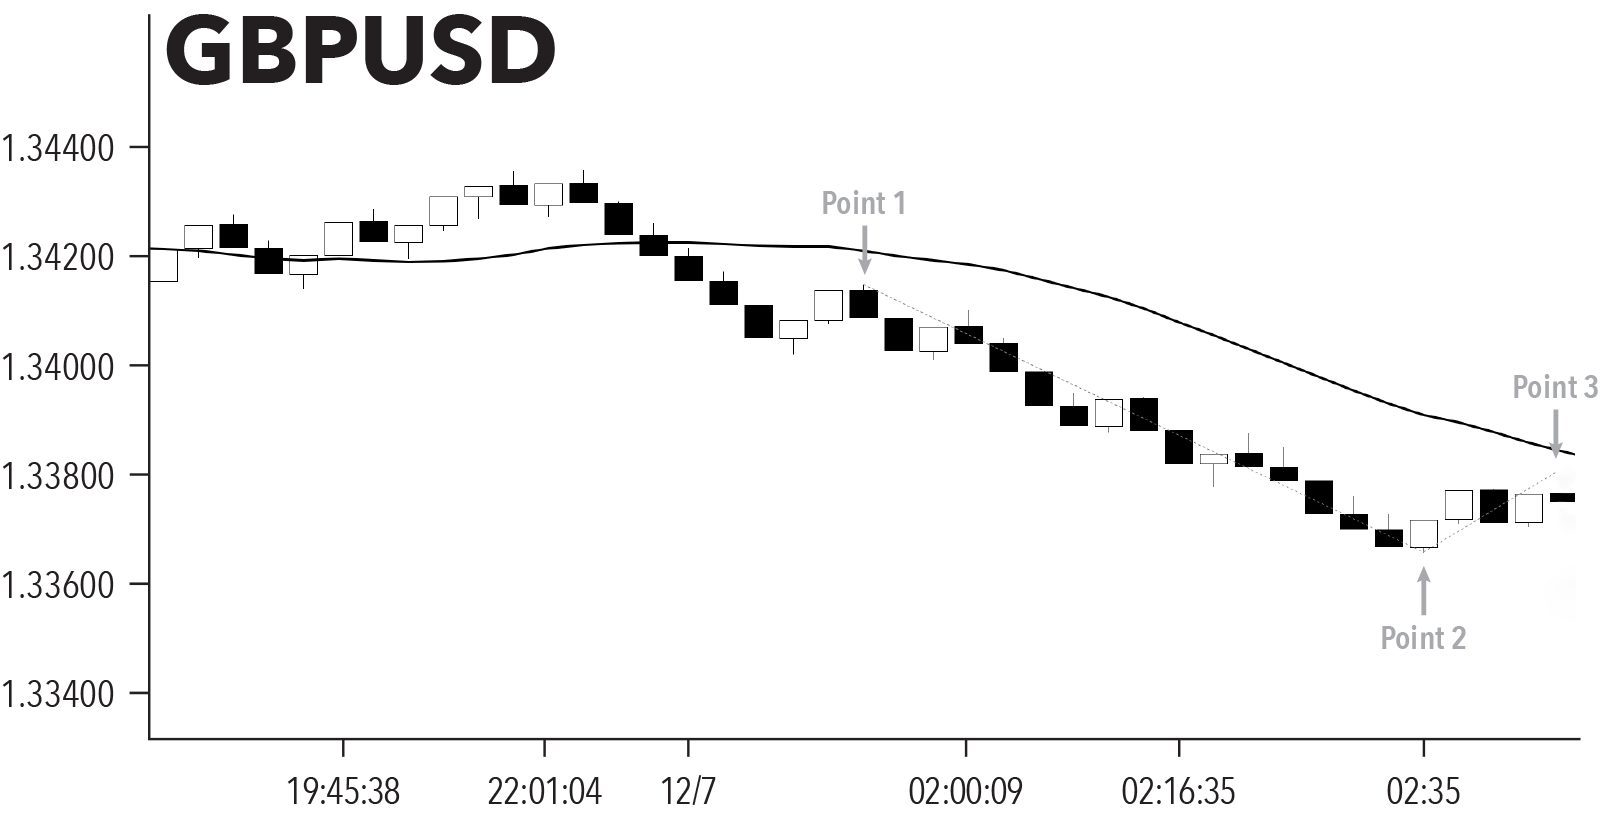
Figure 72, page 197
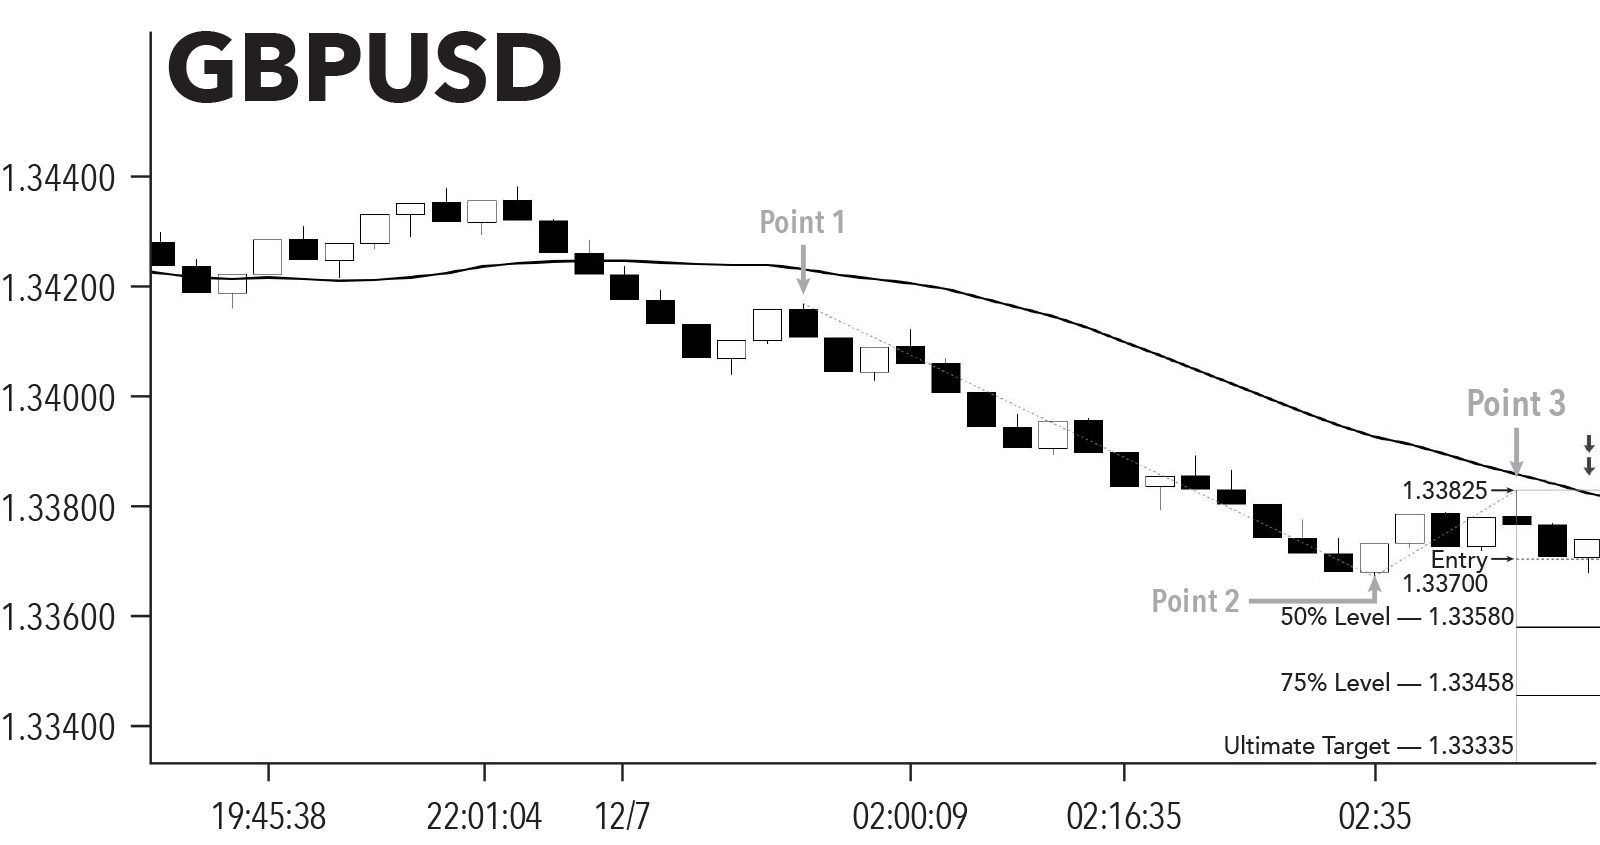
Figure 73, page 201
Figure 74, page 202
Figure 75, page 202
Figure 76, page 204
Figure 77, page 205
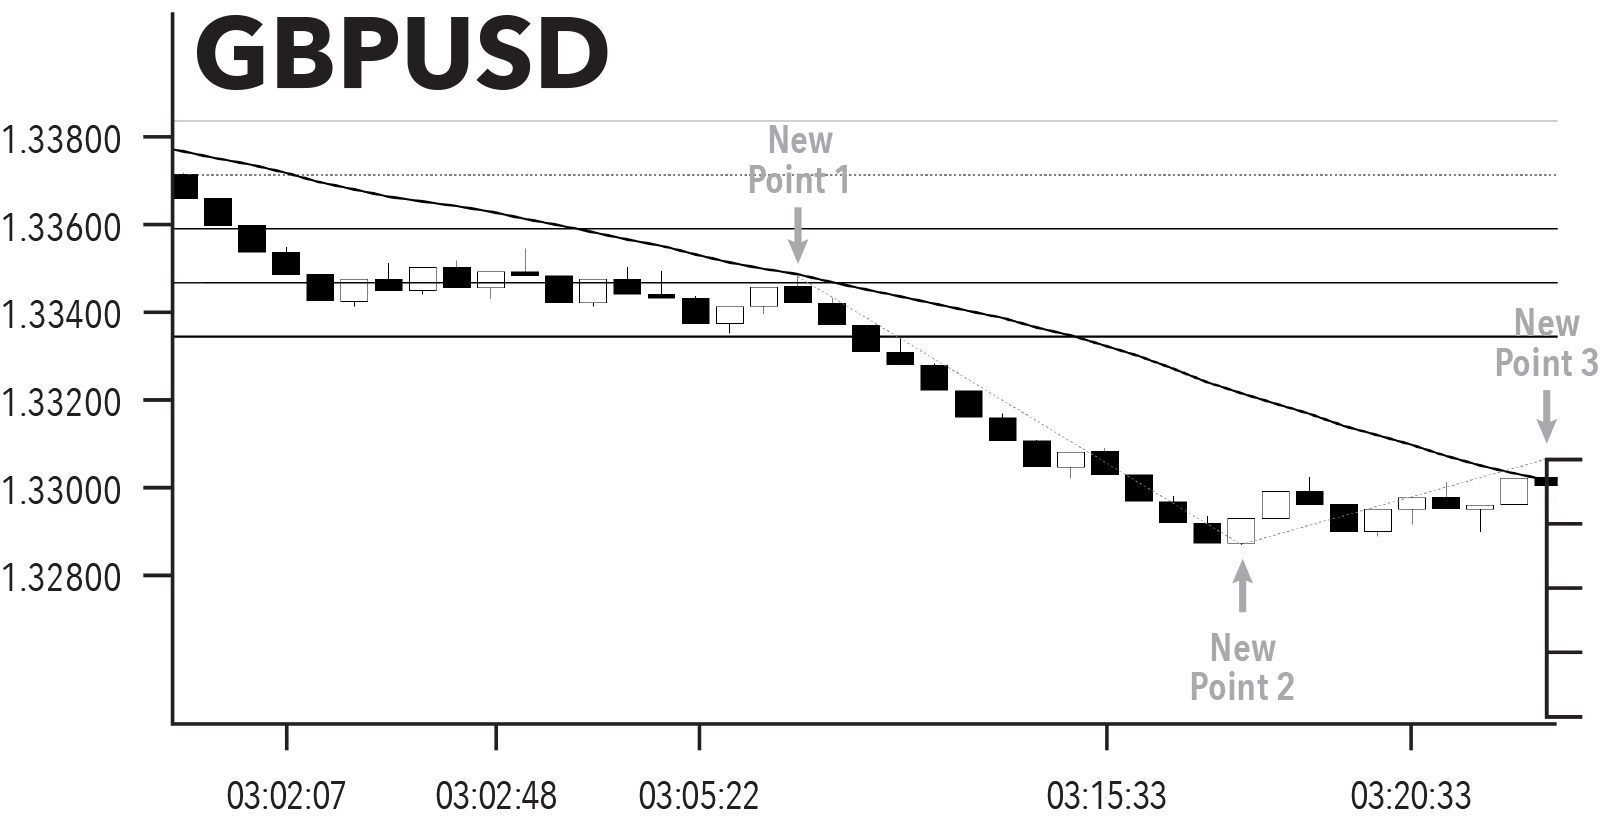
Figure 78, page 206
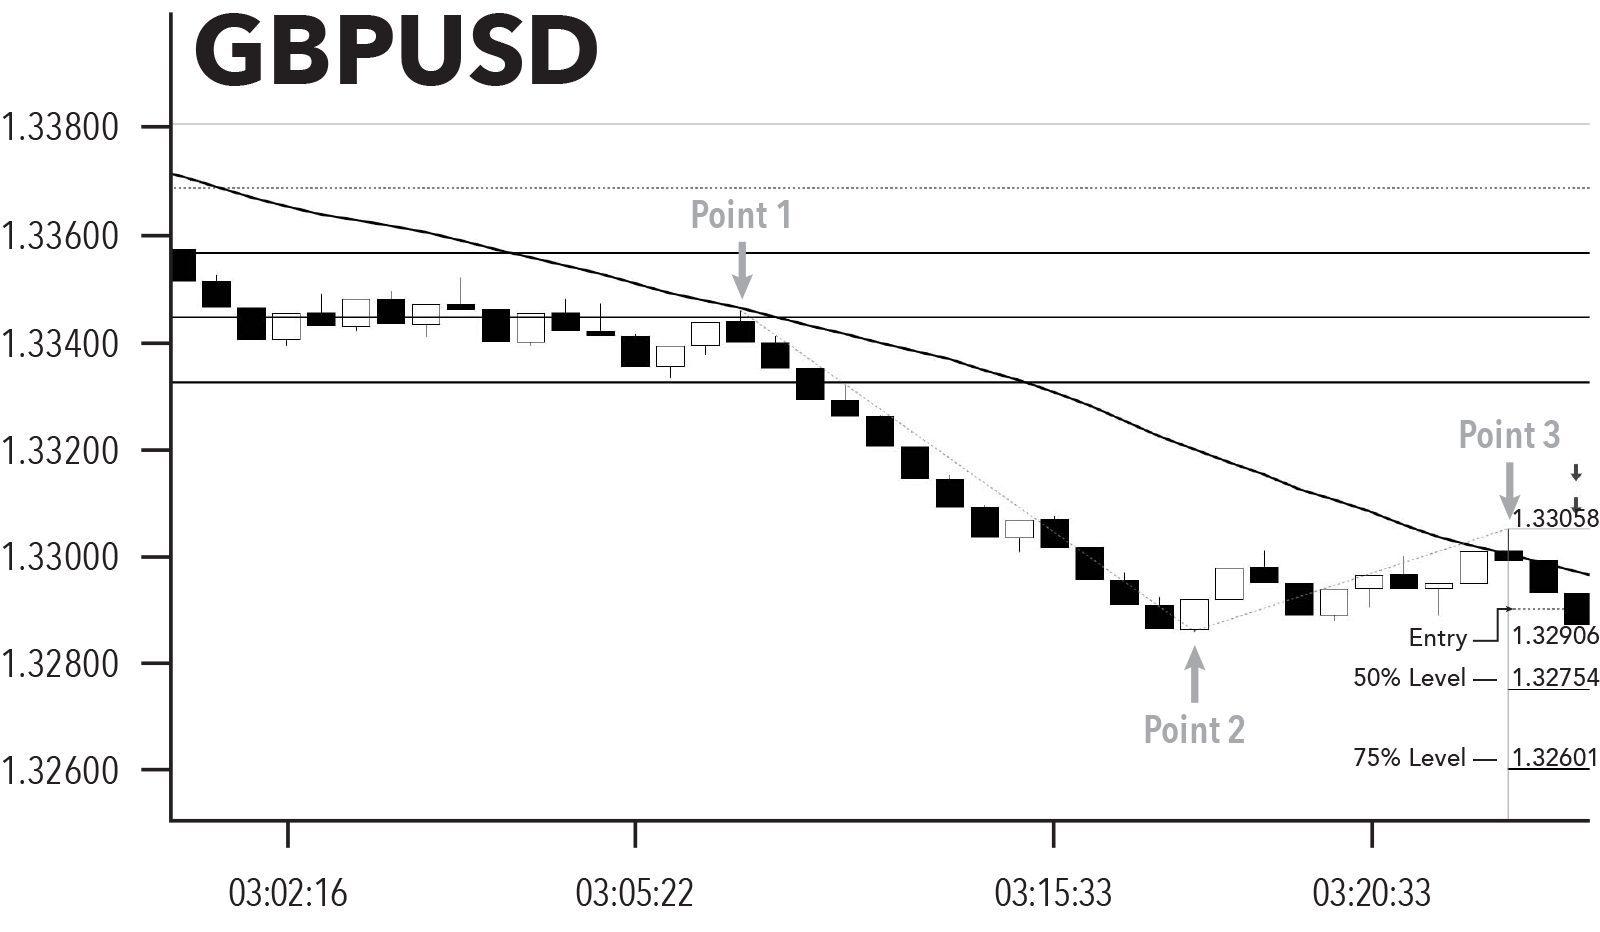
Figure 79, page 206
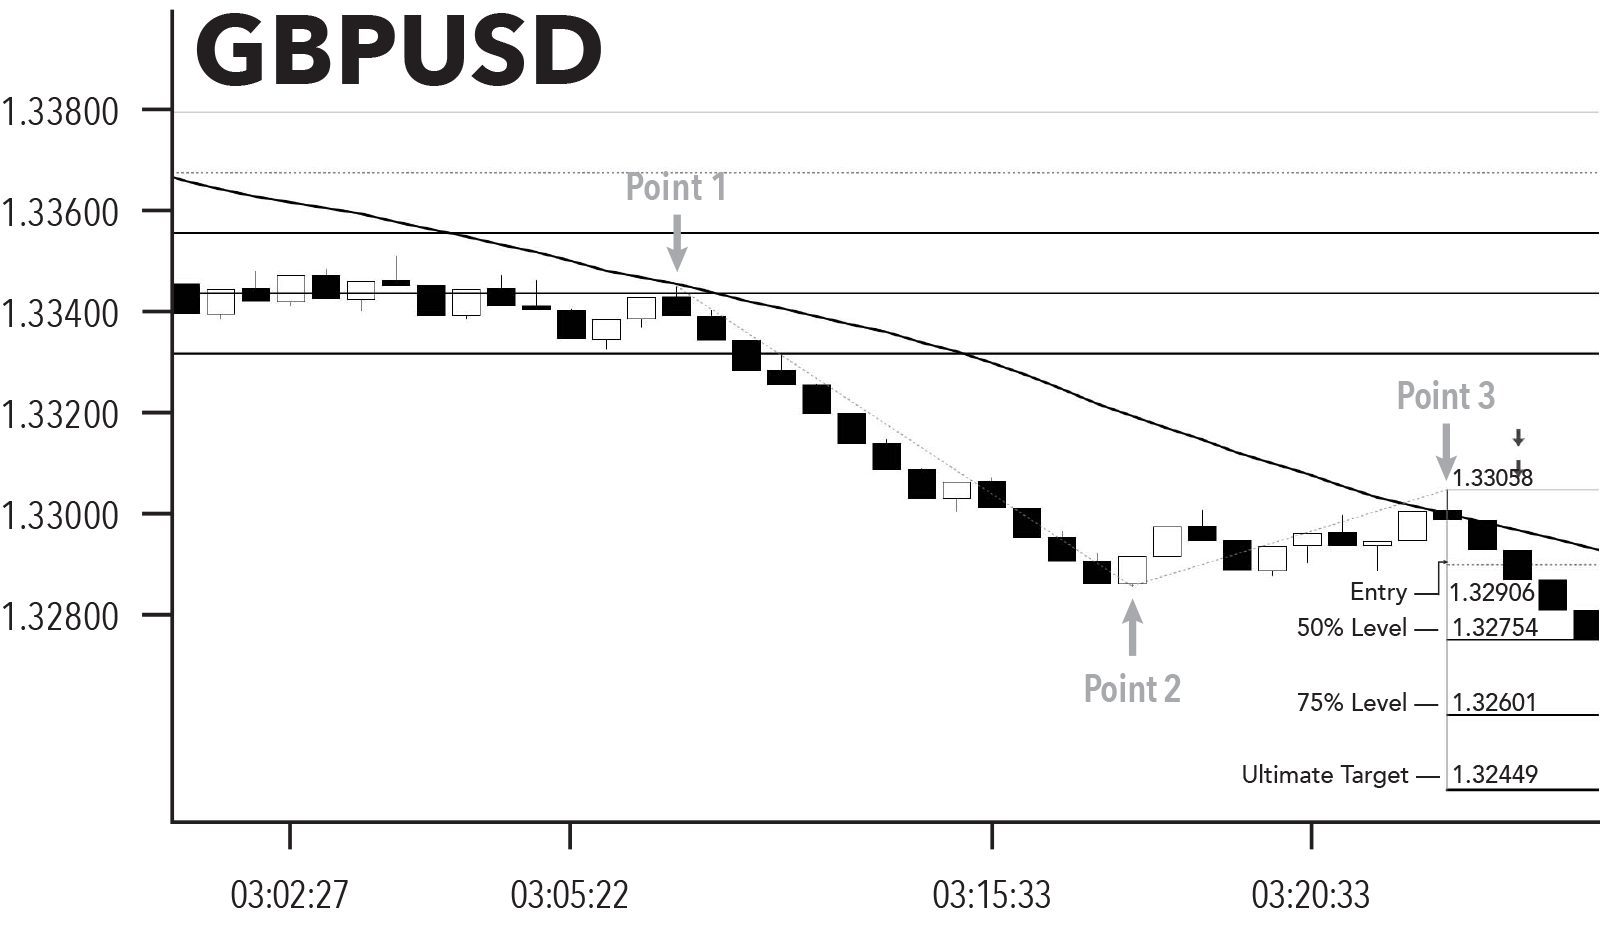
Figure 80, page 207
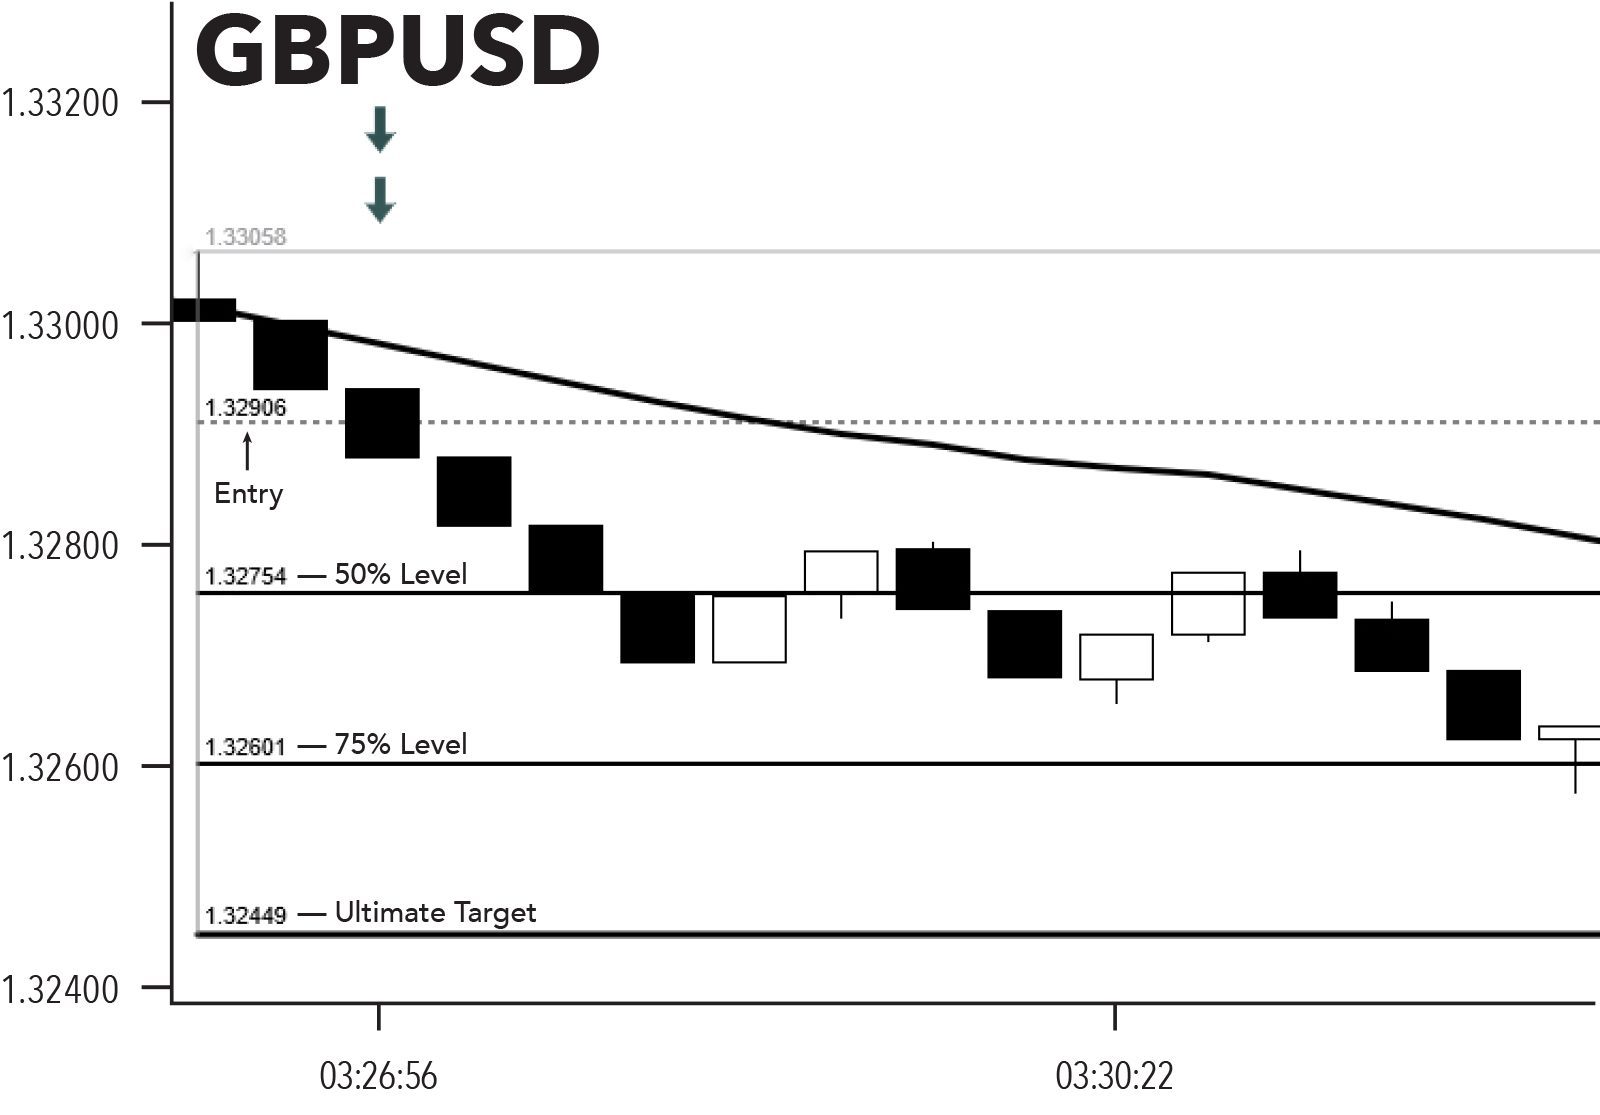
Figure 81, page 208
Figure 82, page 210
Chapter 14: Managing Trades (In the Trading Room)
Exhaustion Trades
Figure 88, page 233
Figure 89, page 234
Figure 90, page 235
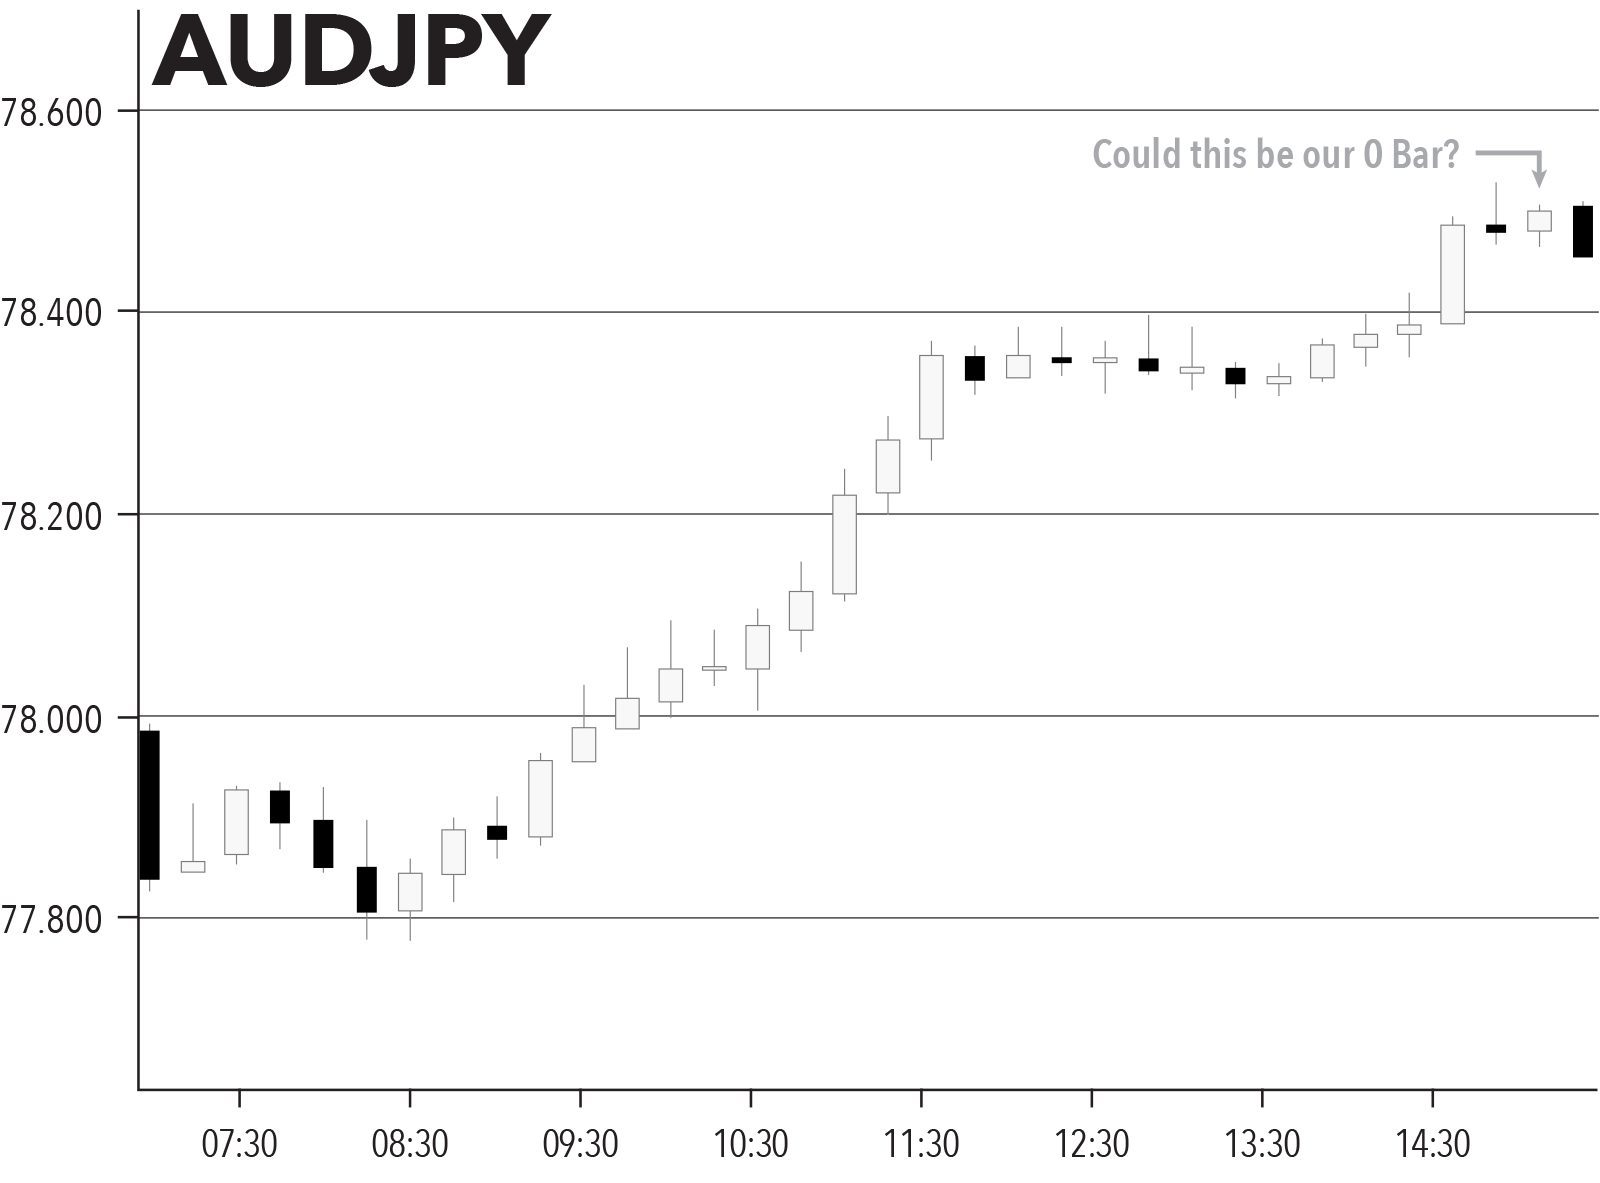
Figure 92, page 236
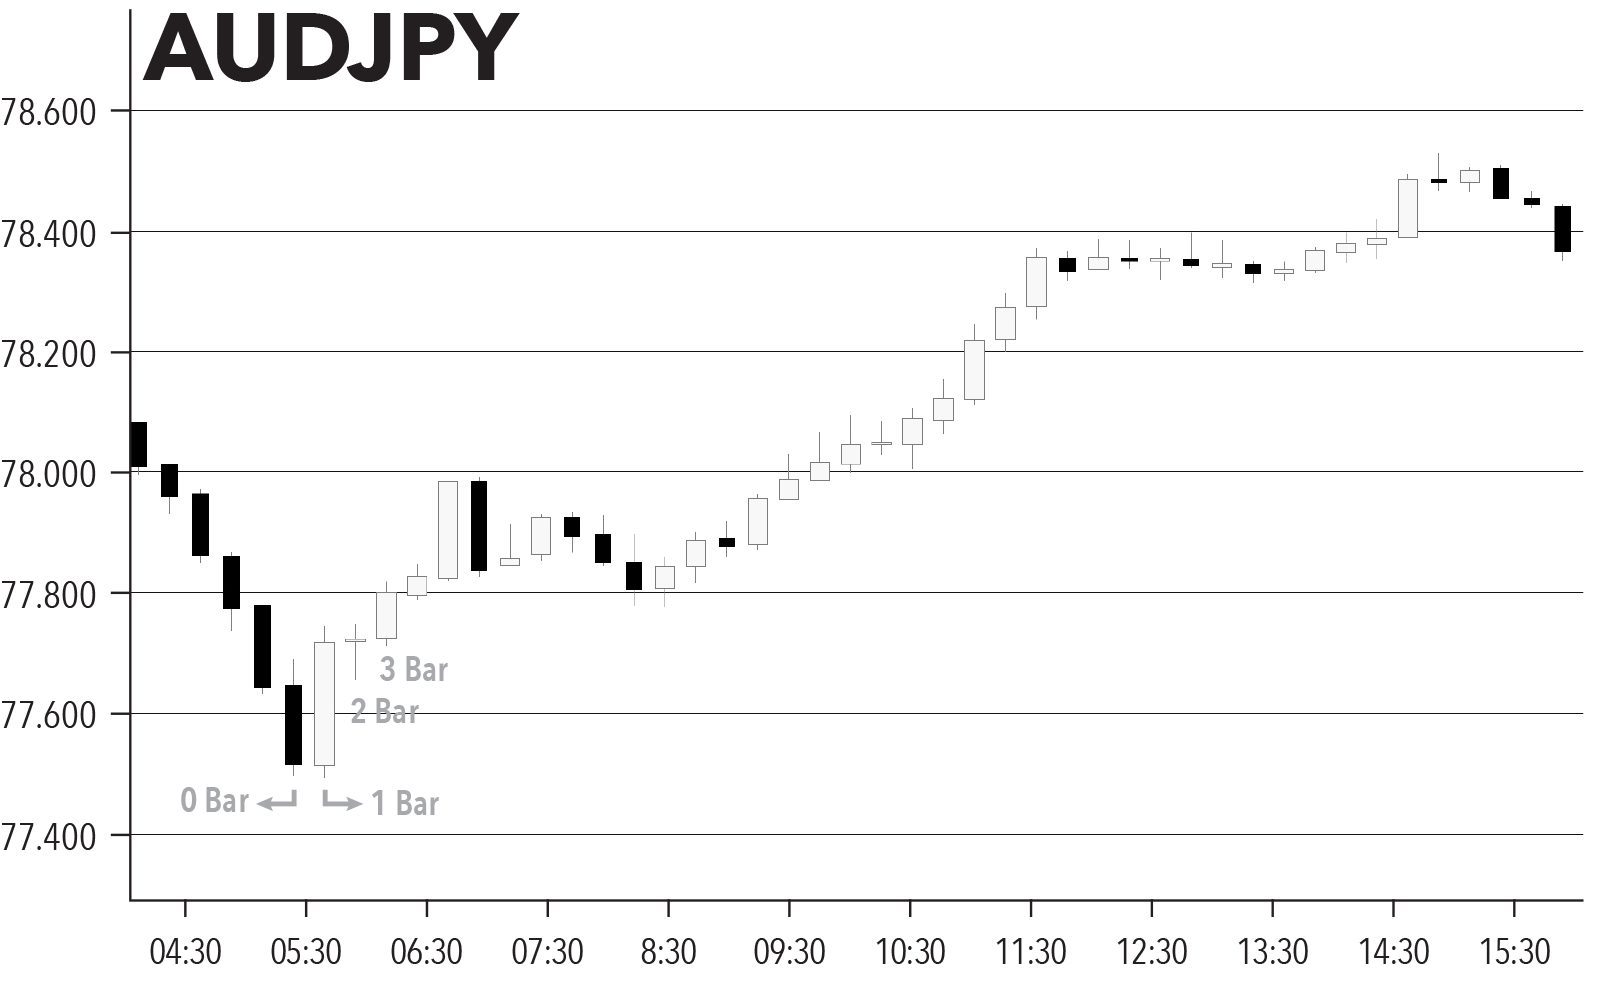
Figure 93, page 236
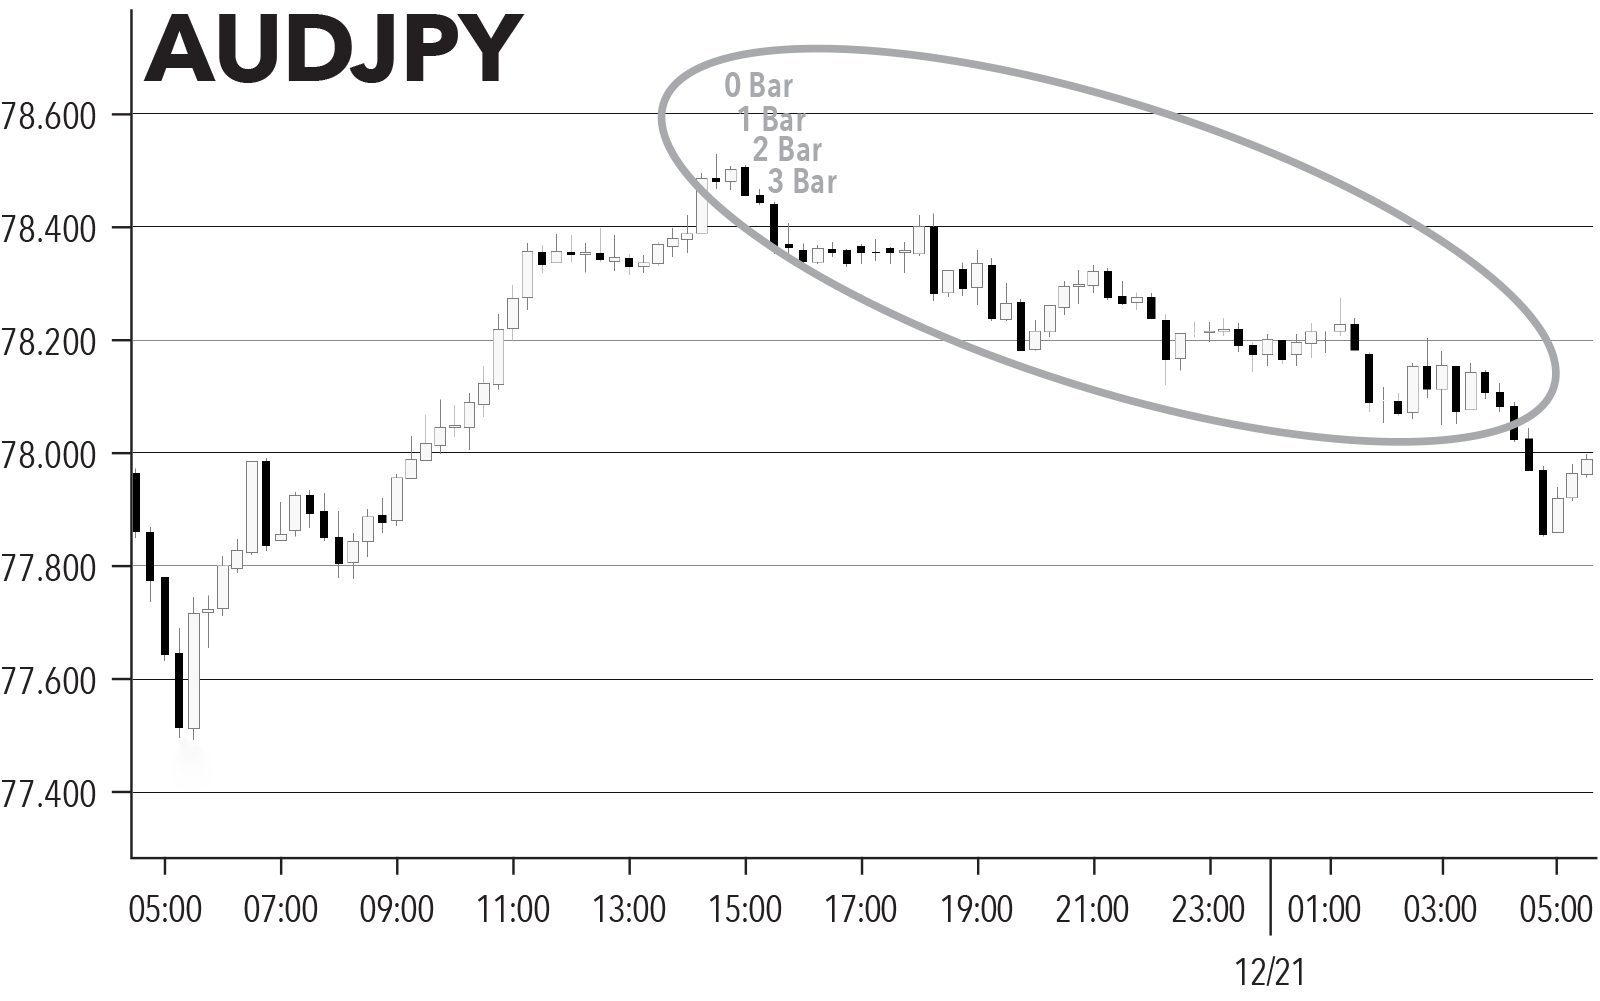
Figure 94, page 237
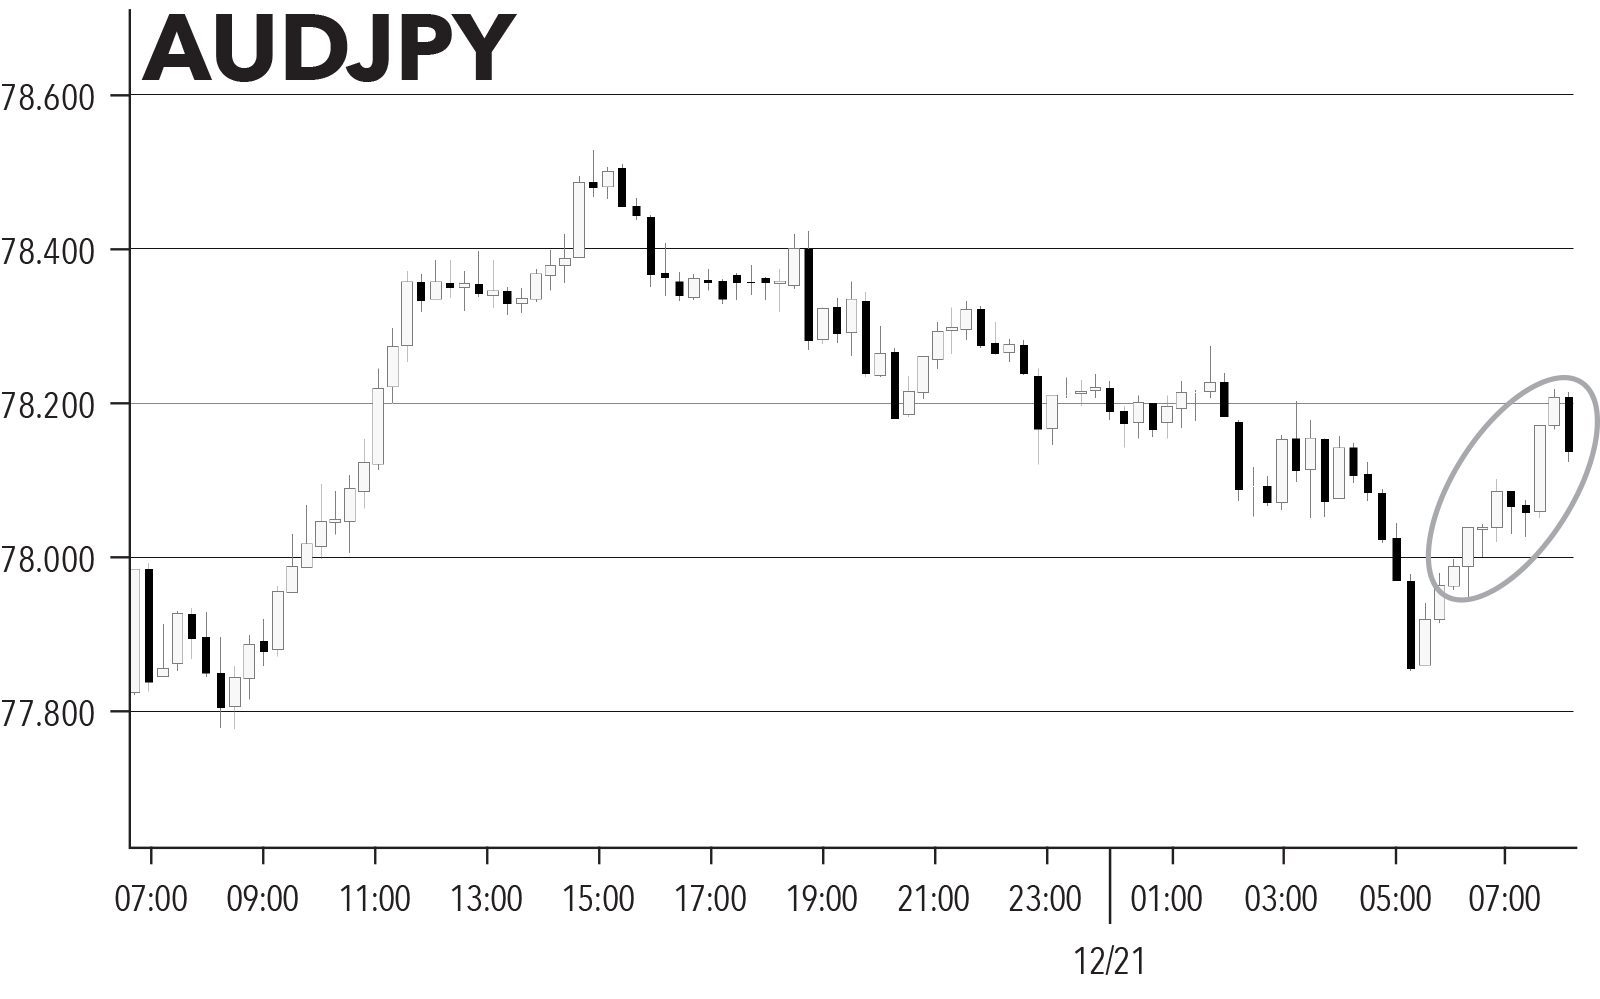
Figure 95, page 238
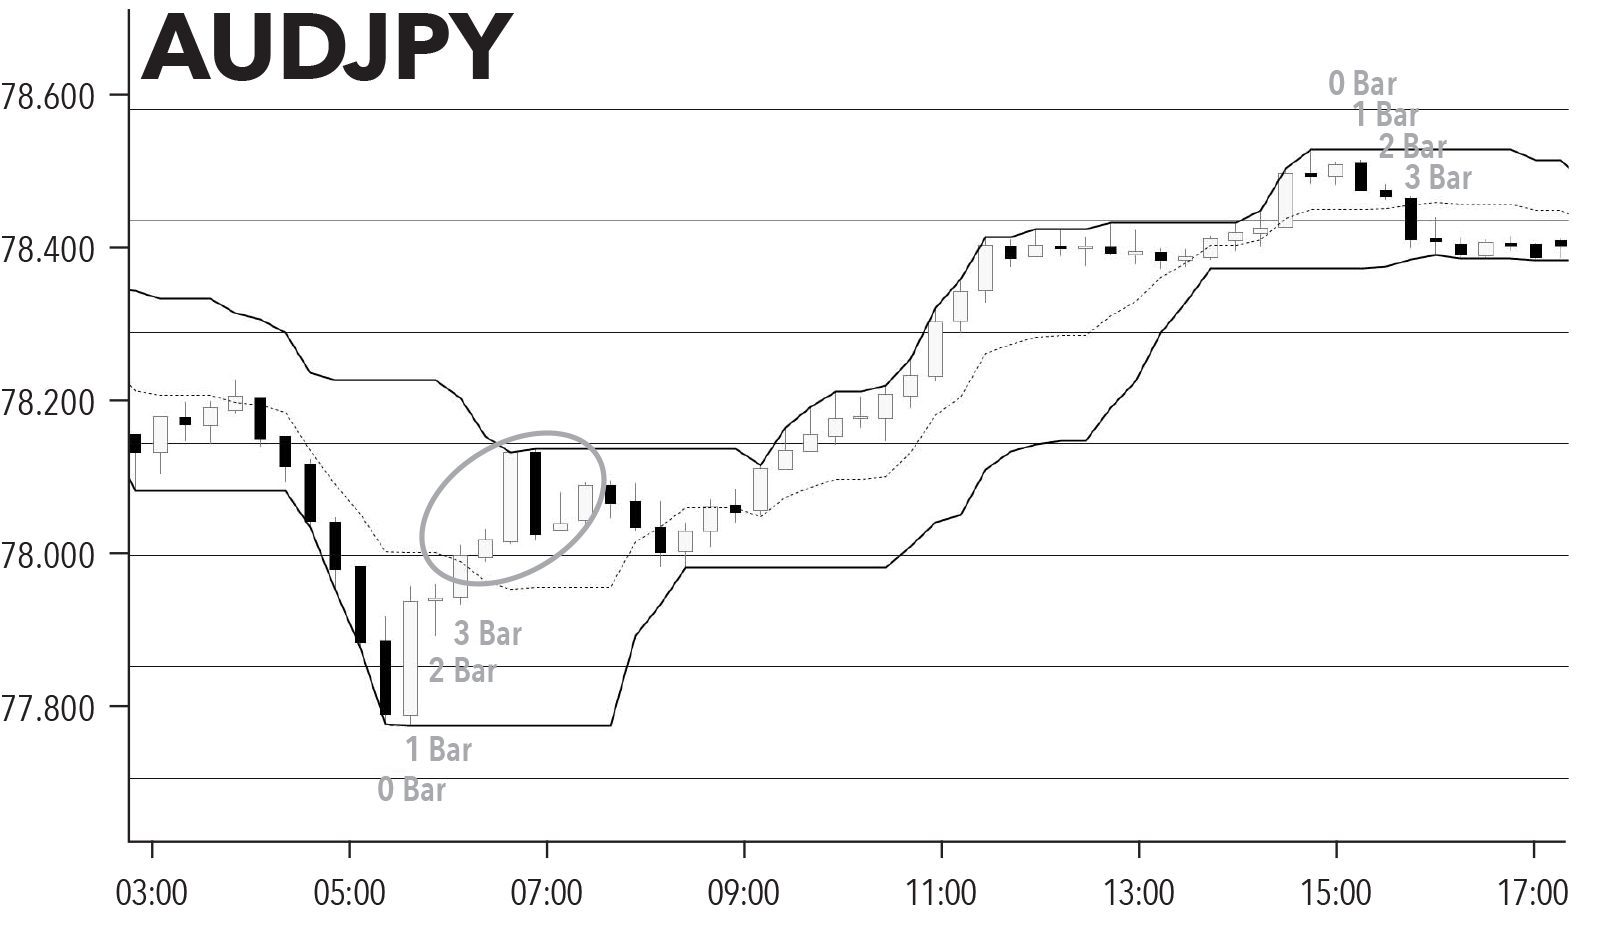
Figure 96, page 240
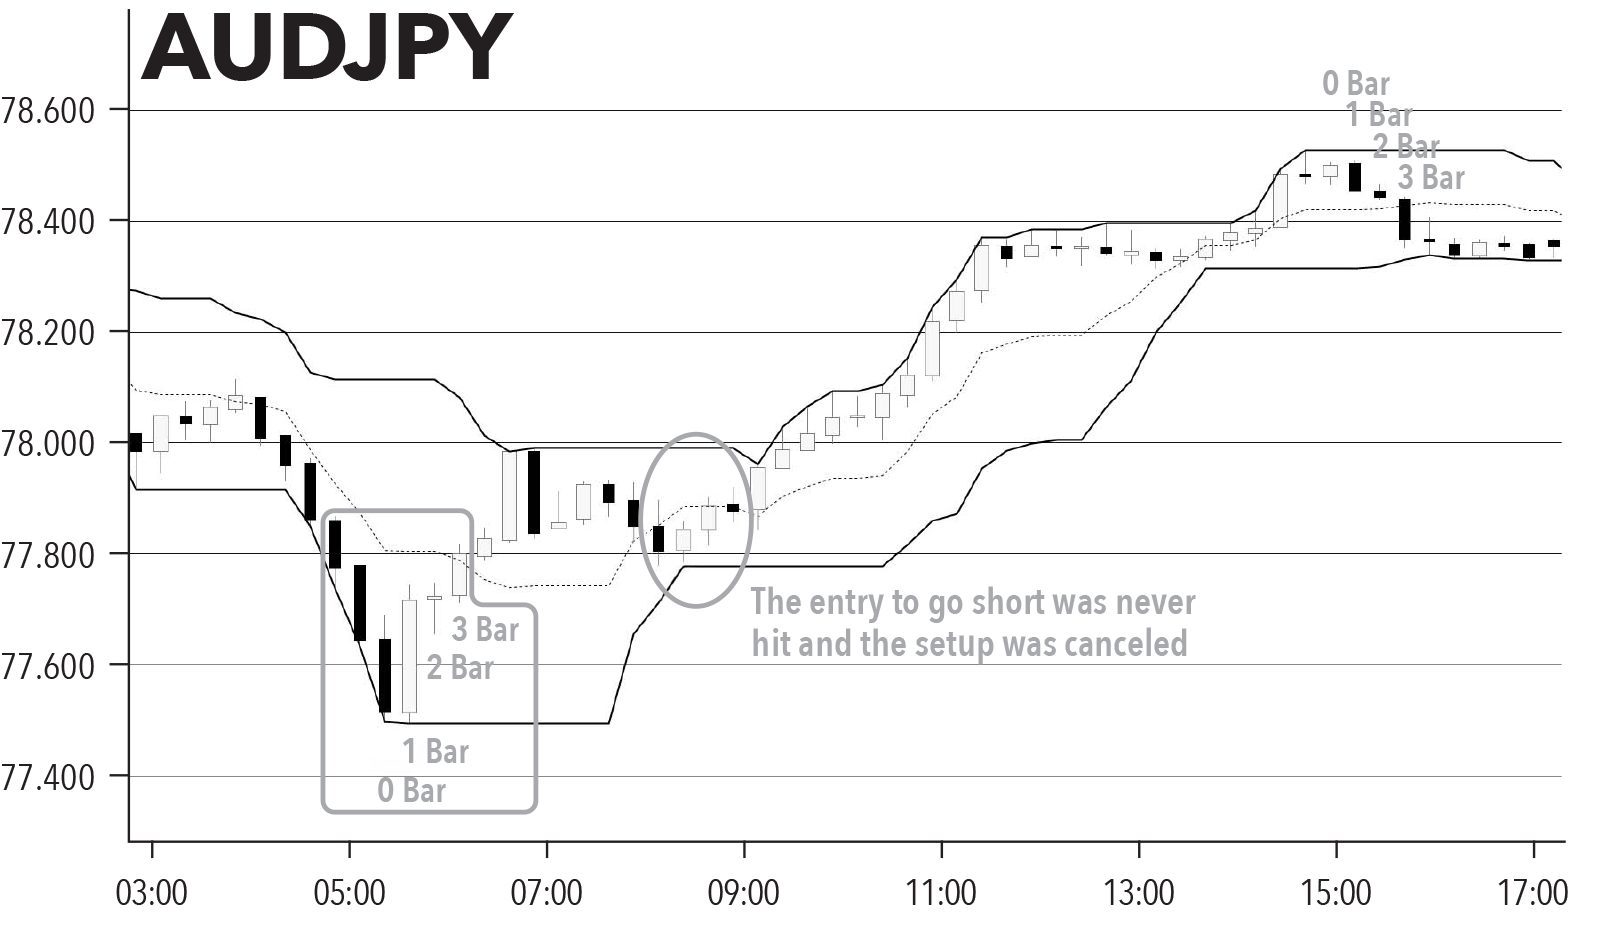
Figure 97, page 241
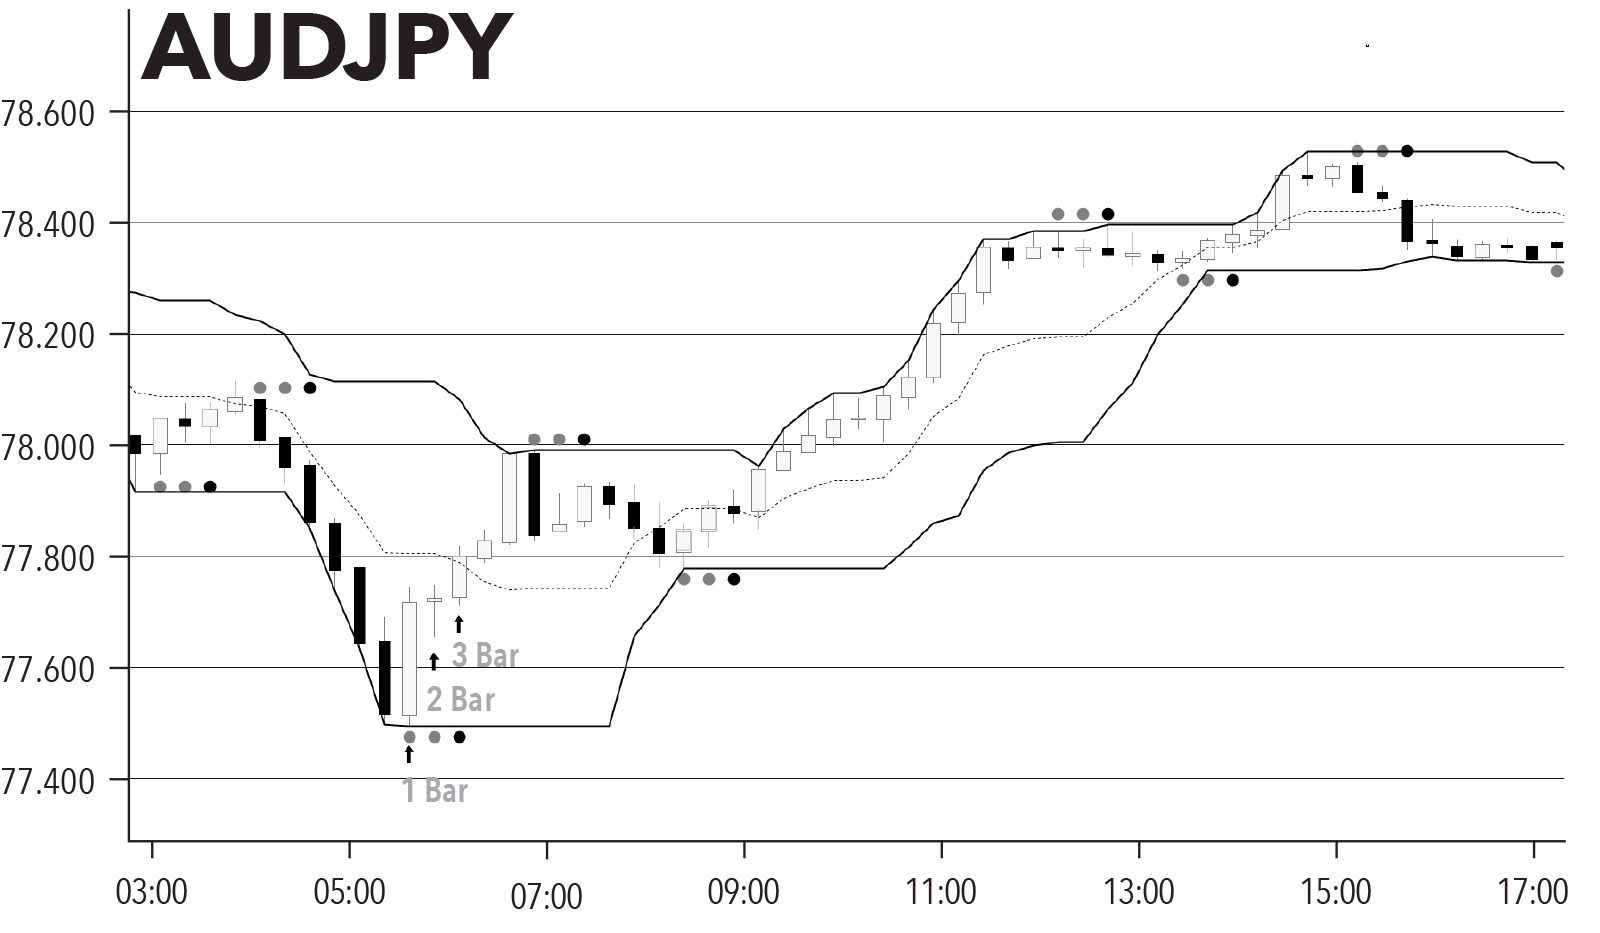
Figure 99, page 244
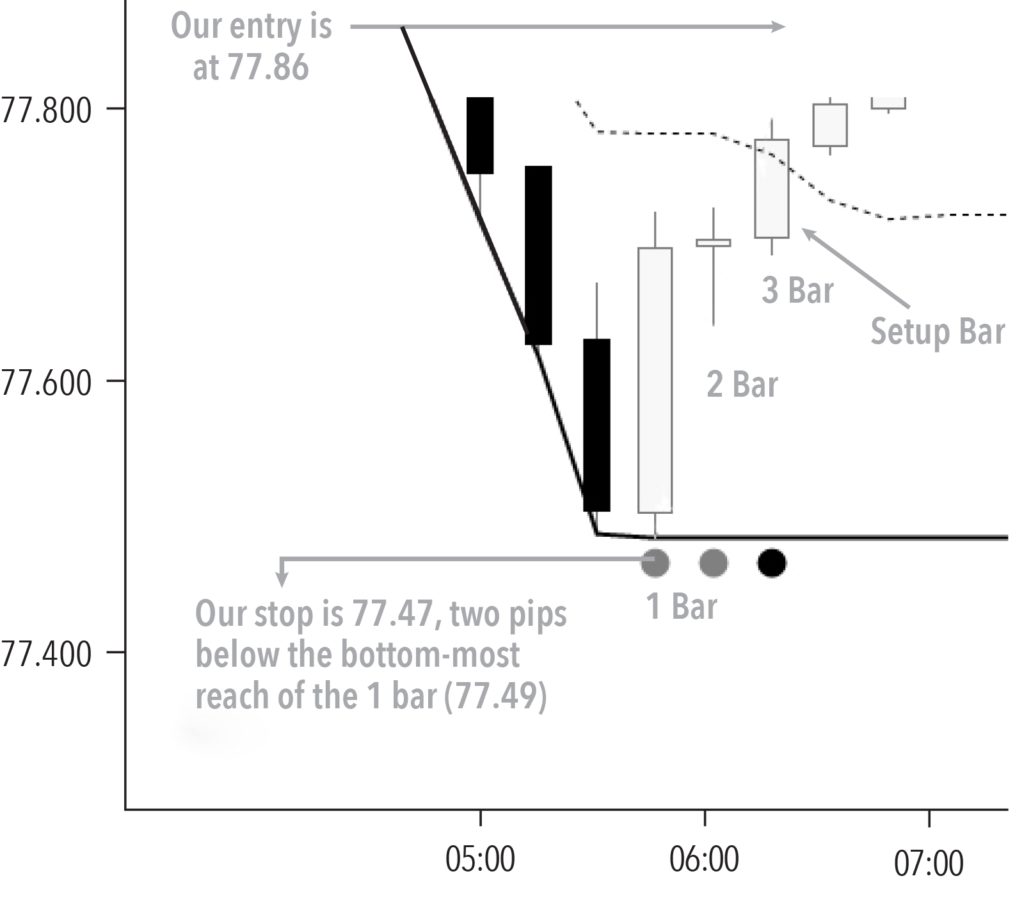
Figure 100, page 245
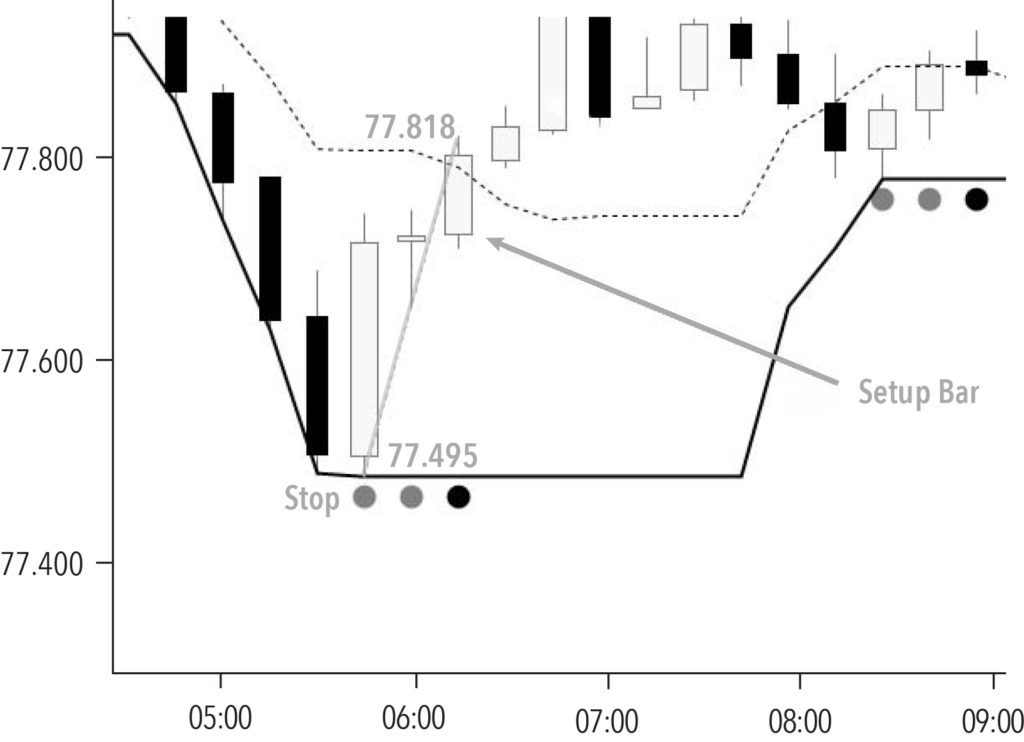
Figure 101, page 246
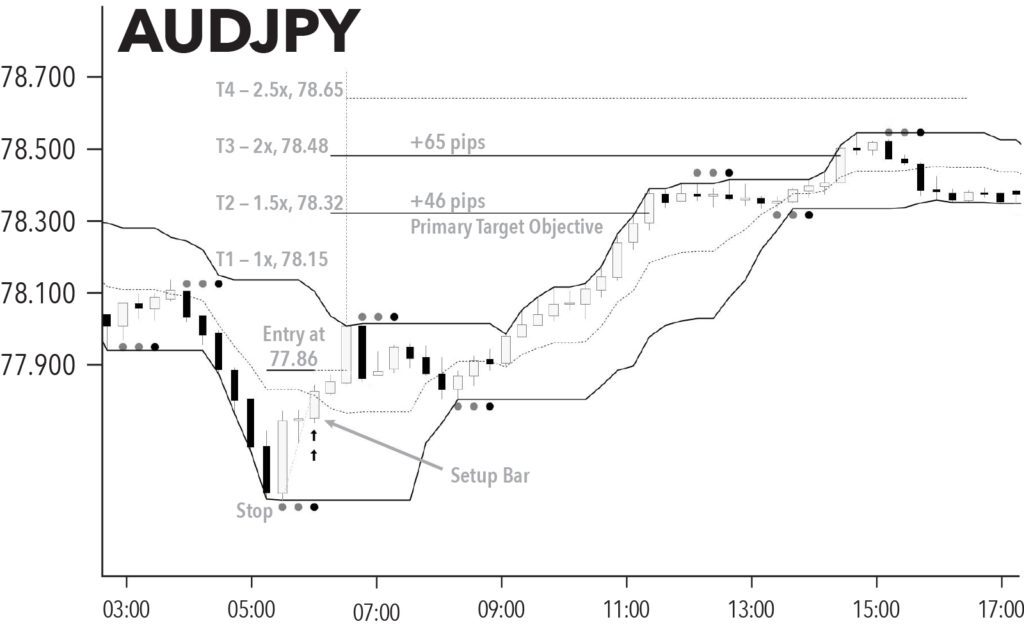
Figure 102, page 249
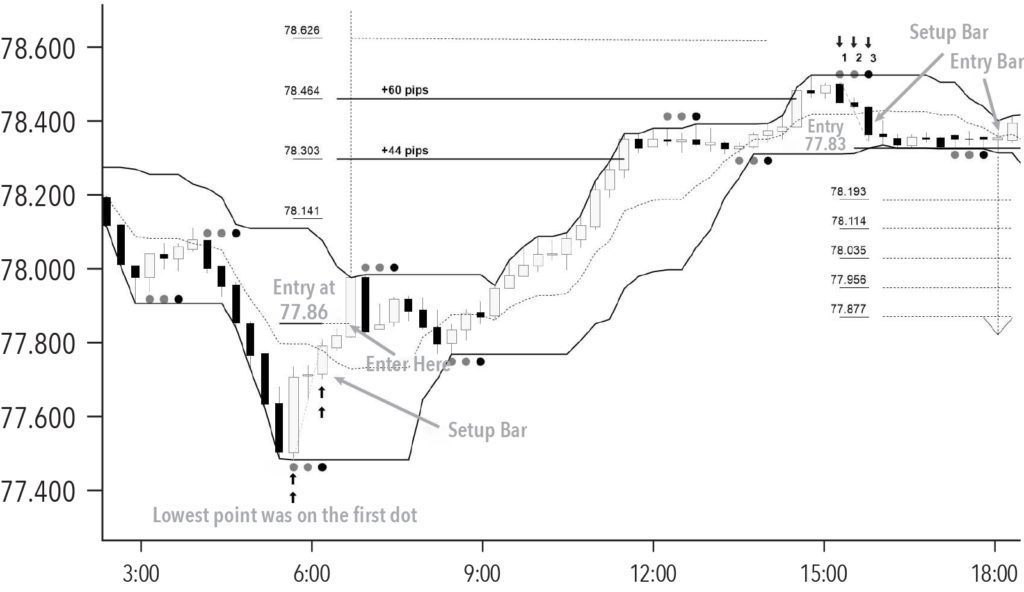
Figure 103, page 250
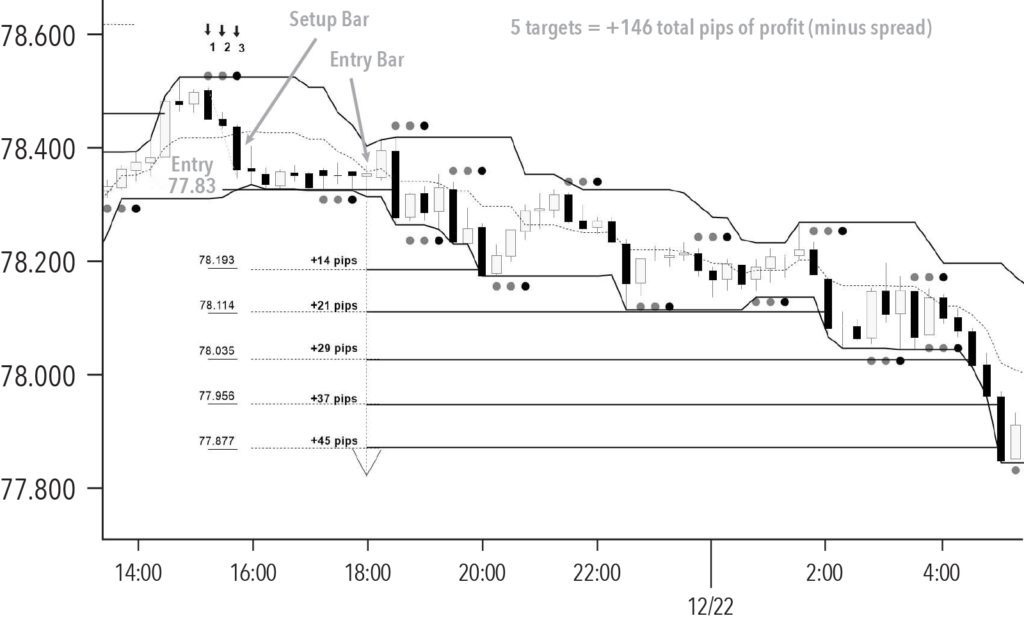
Figure 104, page 251
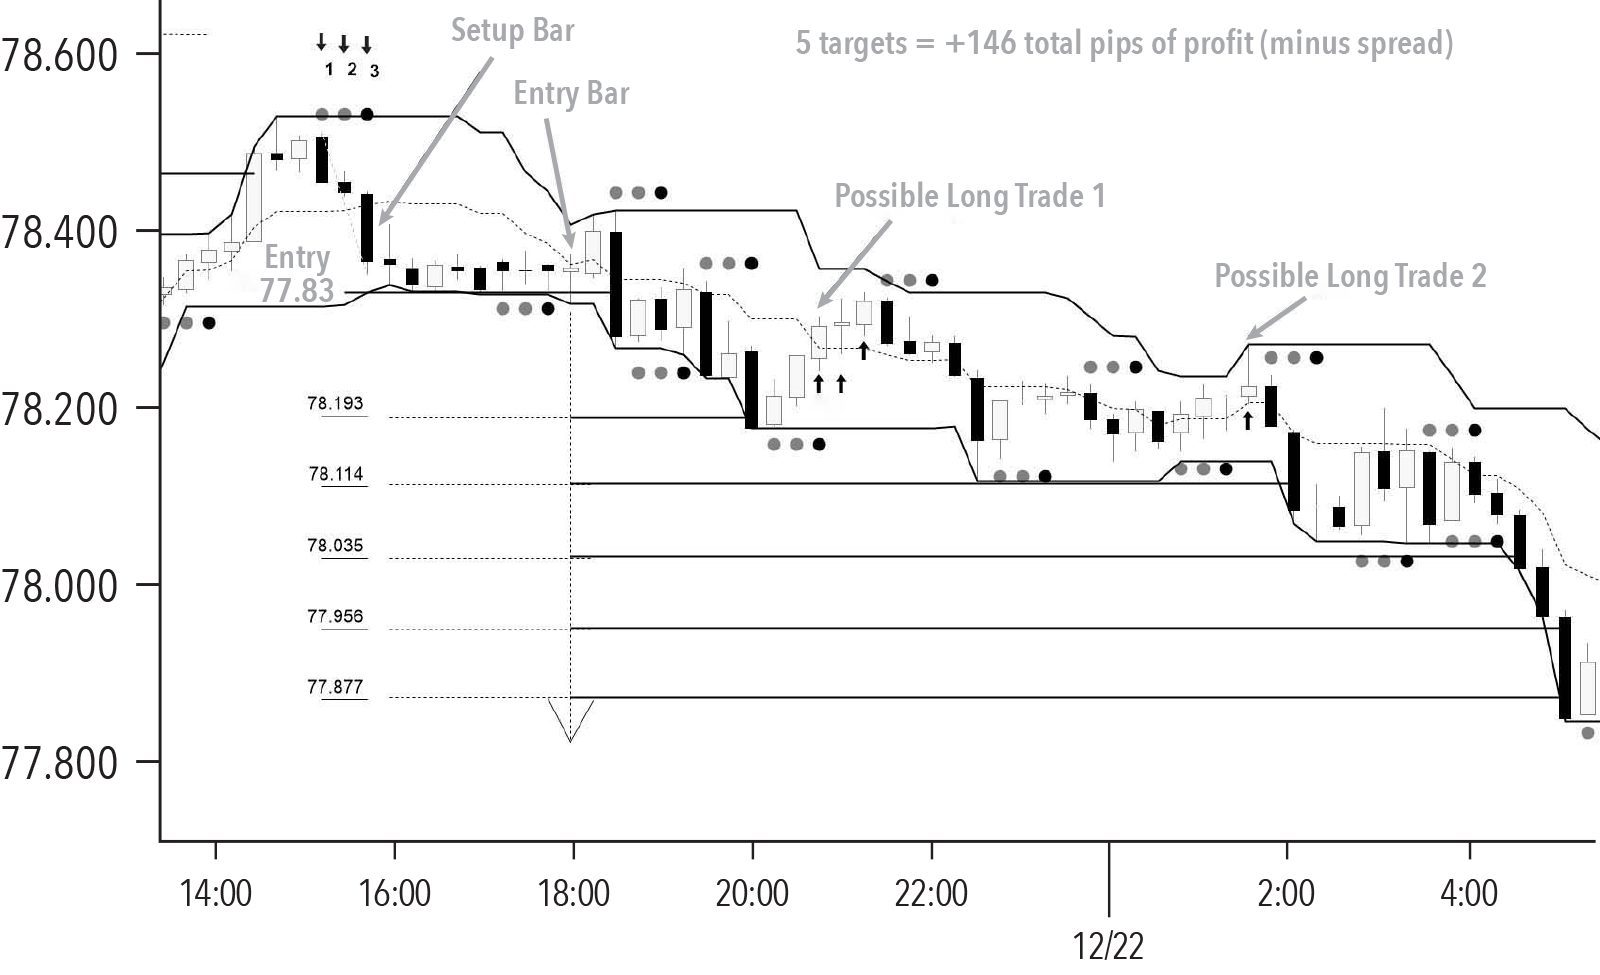
Figure 105, page 254
Chapter 14: Managing Trades (In the Trading Room)
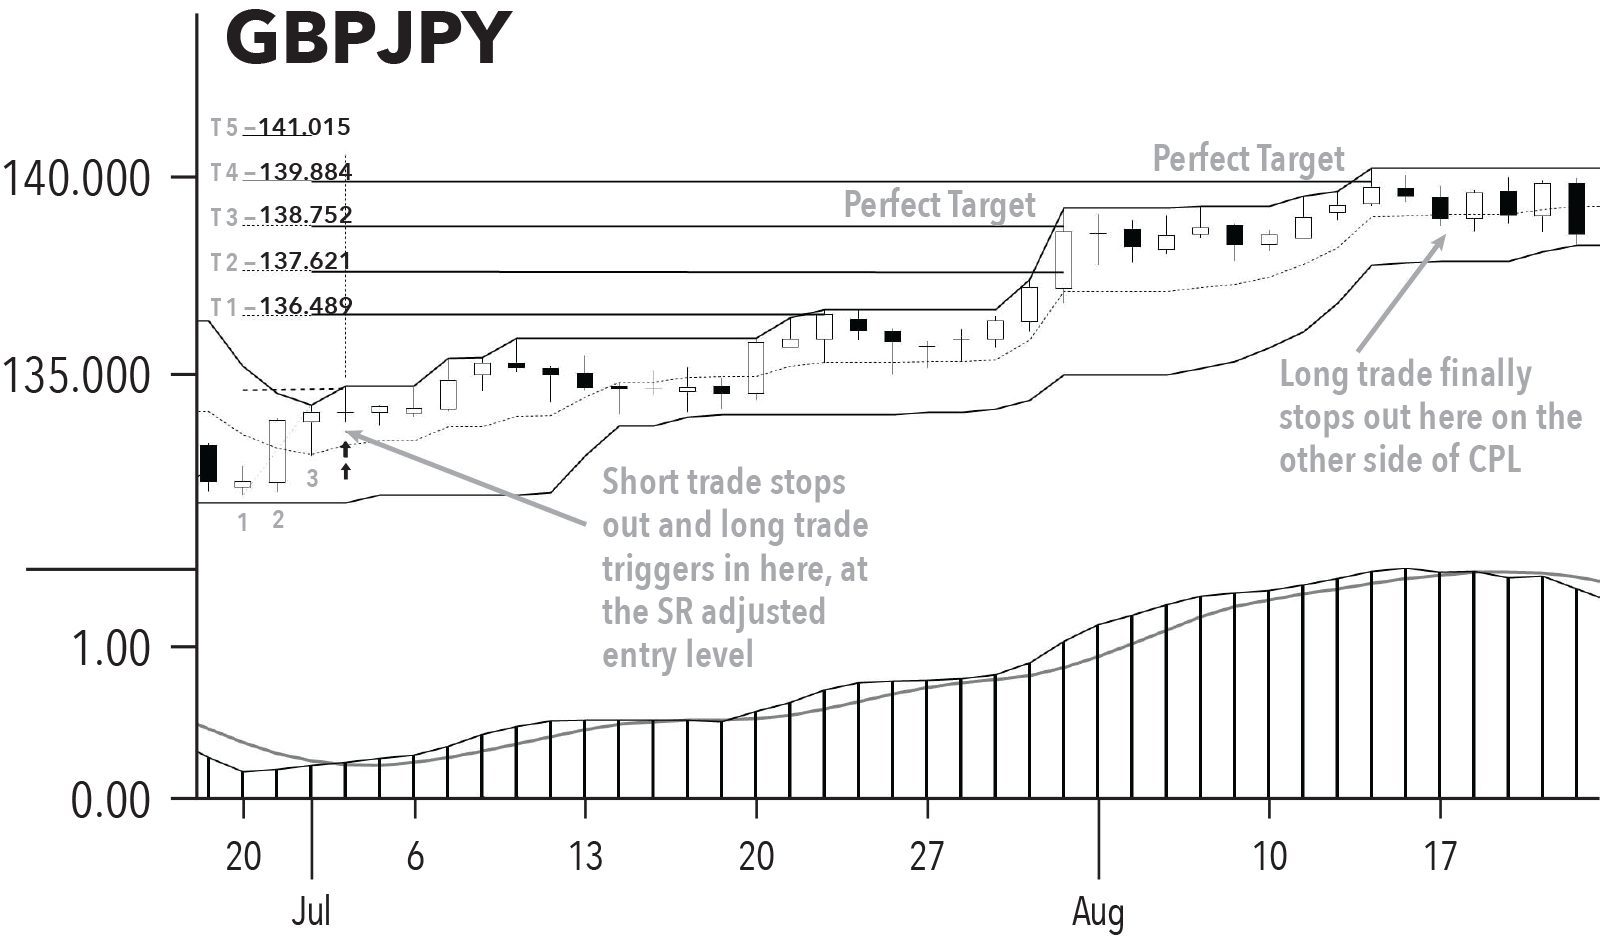
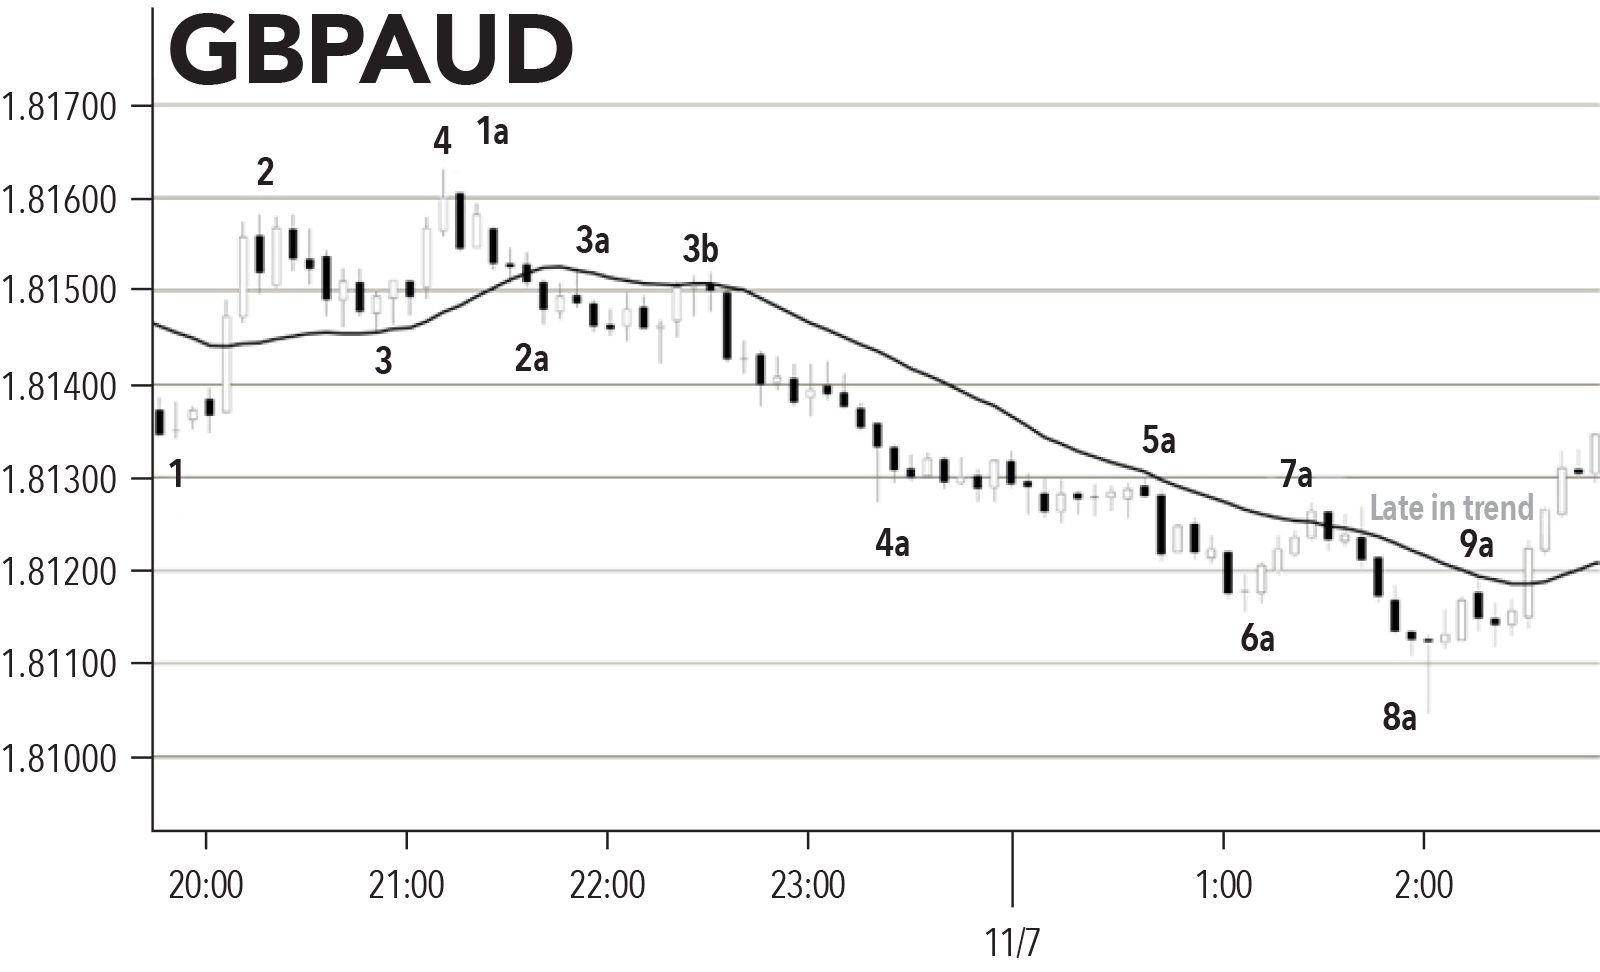
Swing Trading Using Exhaustion Trades
Figure 106, page 259
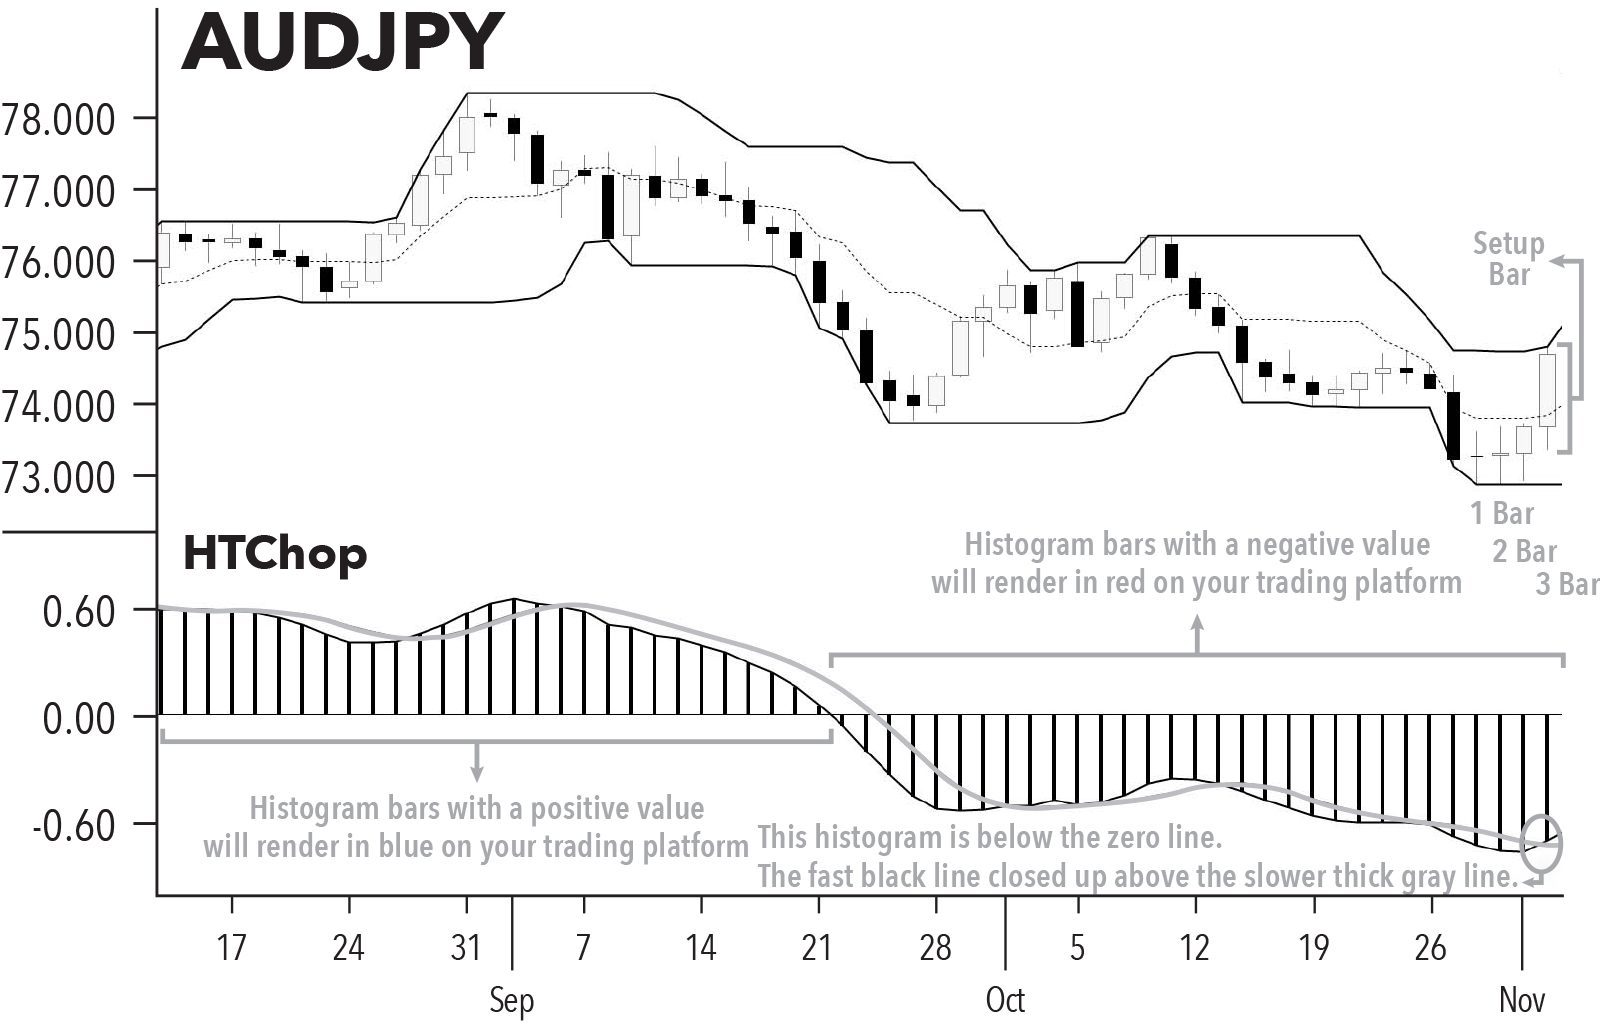
Figure 107, page 260
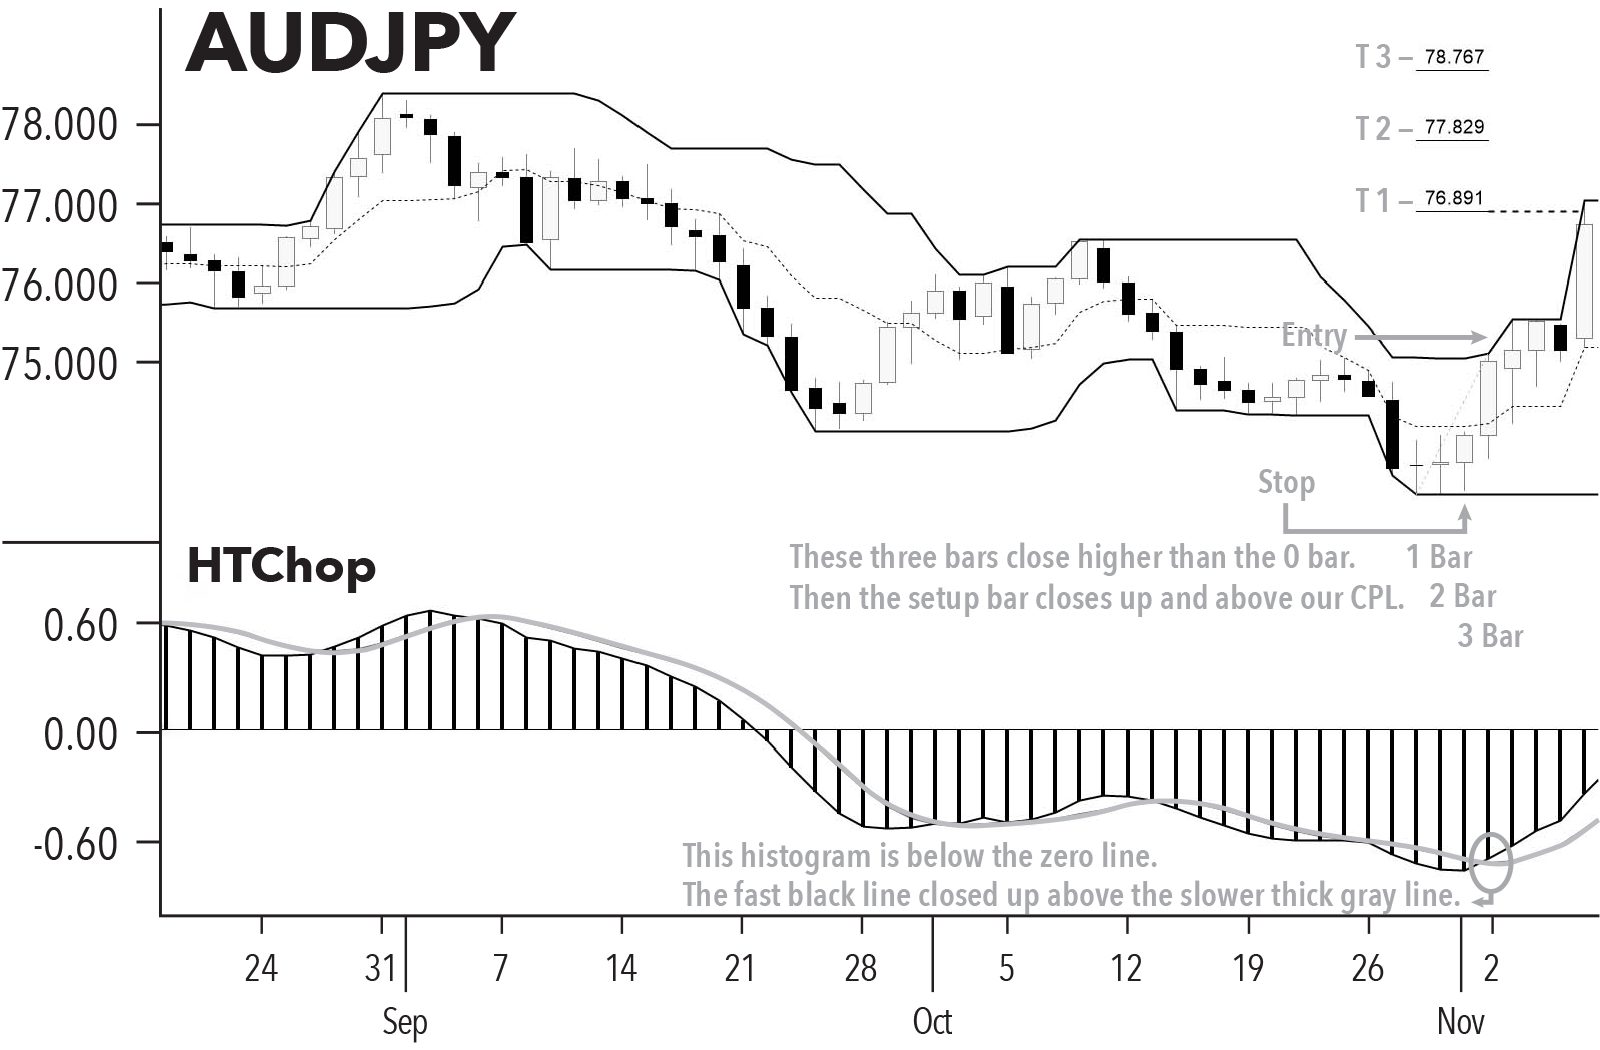
Figure 108, page 262
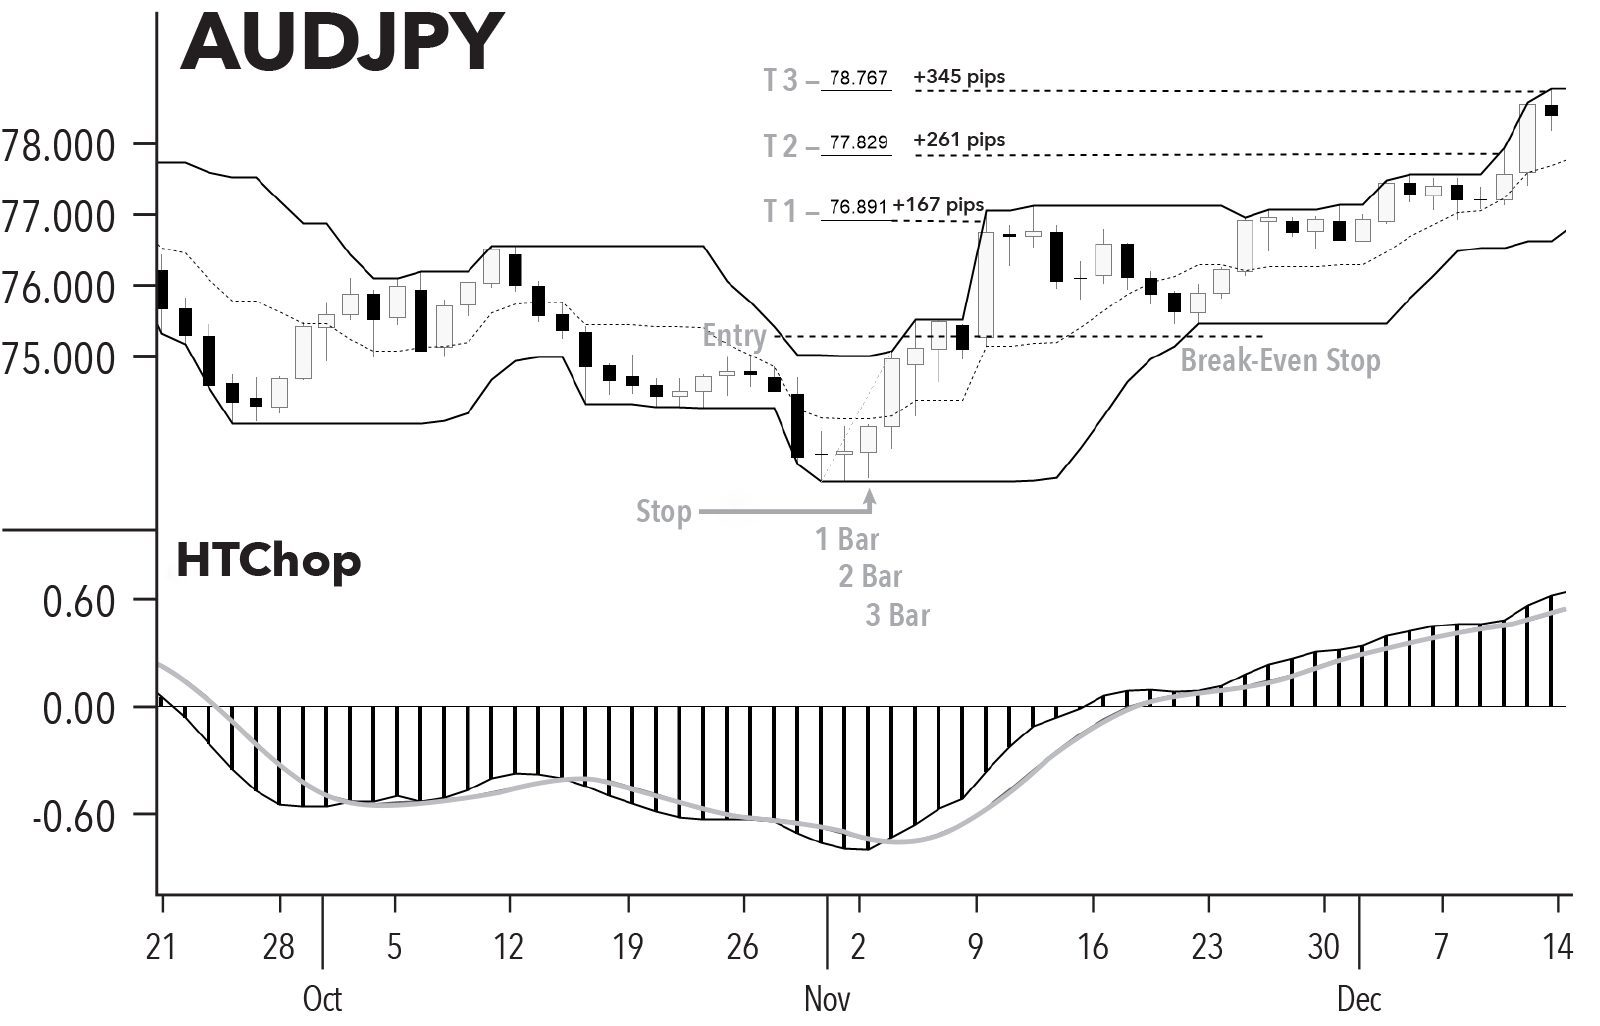
Figure 109, page 263
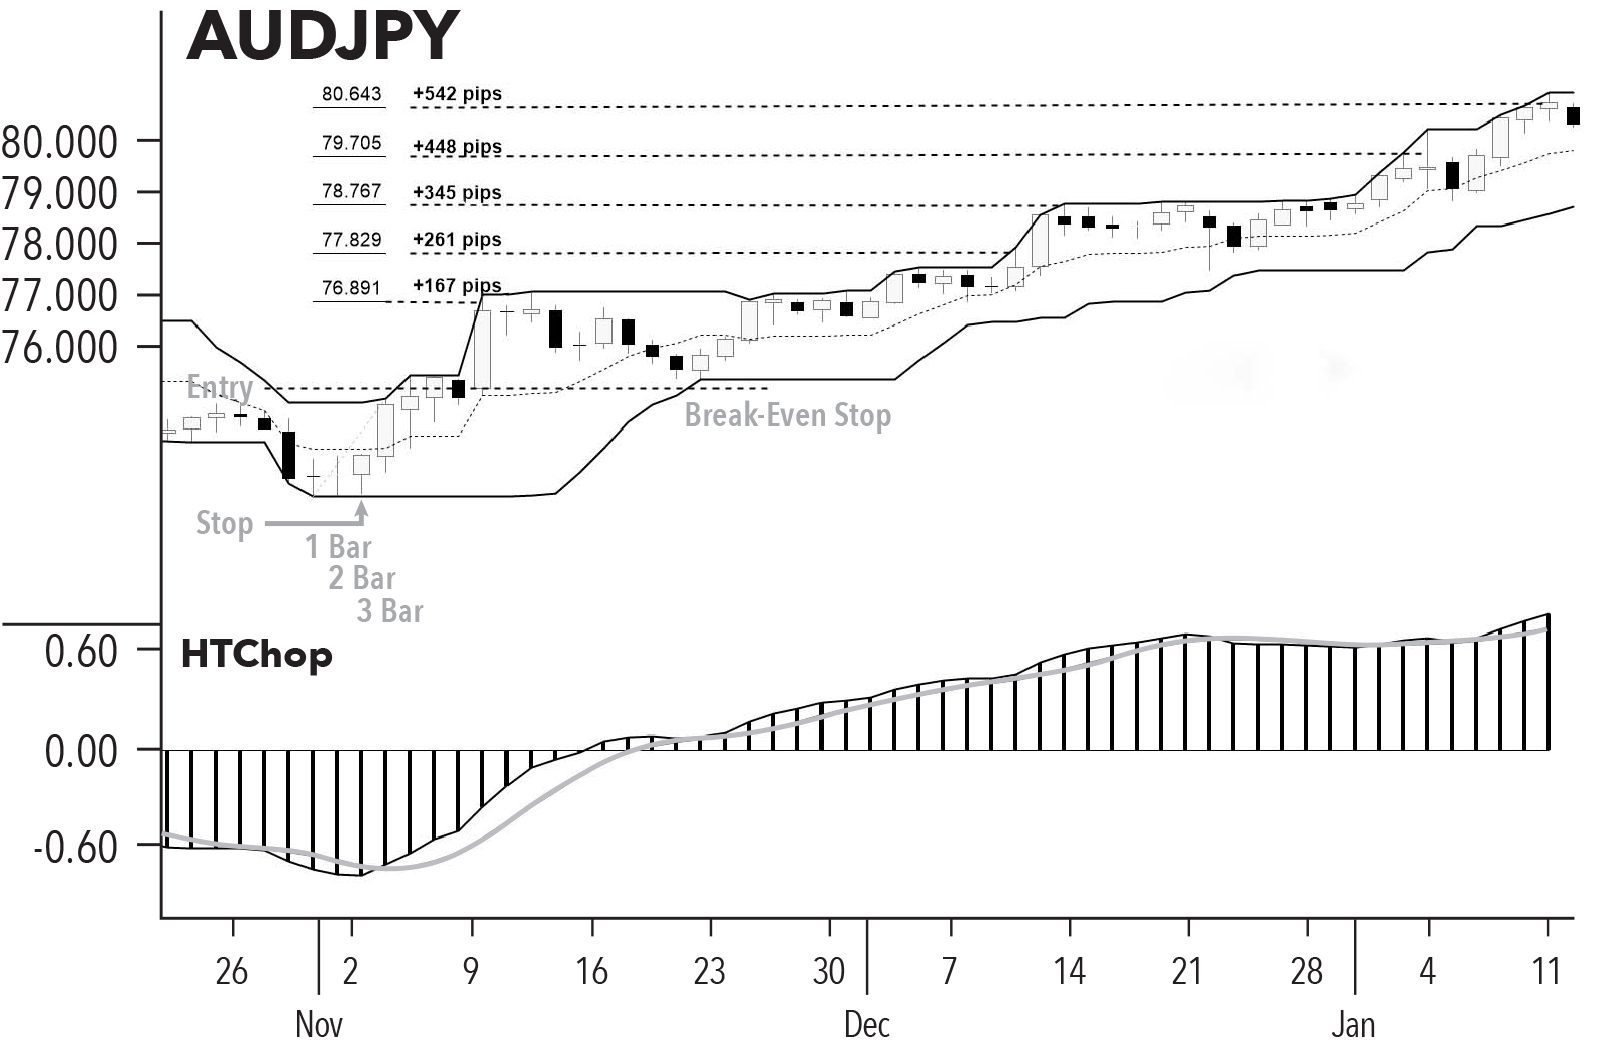
Figure 110, page 264
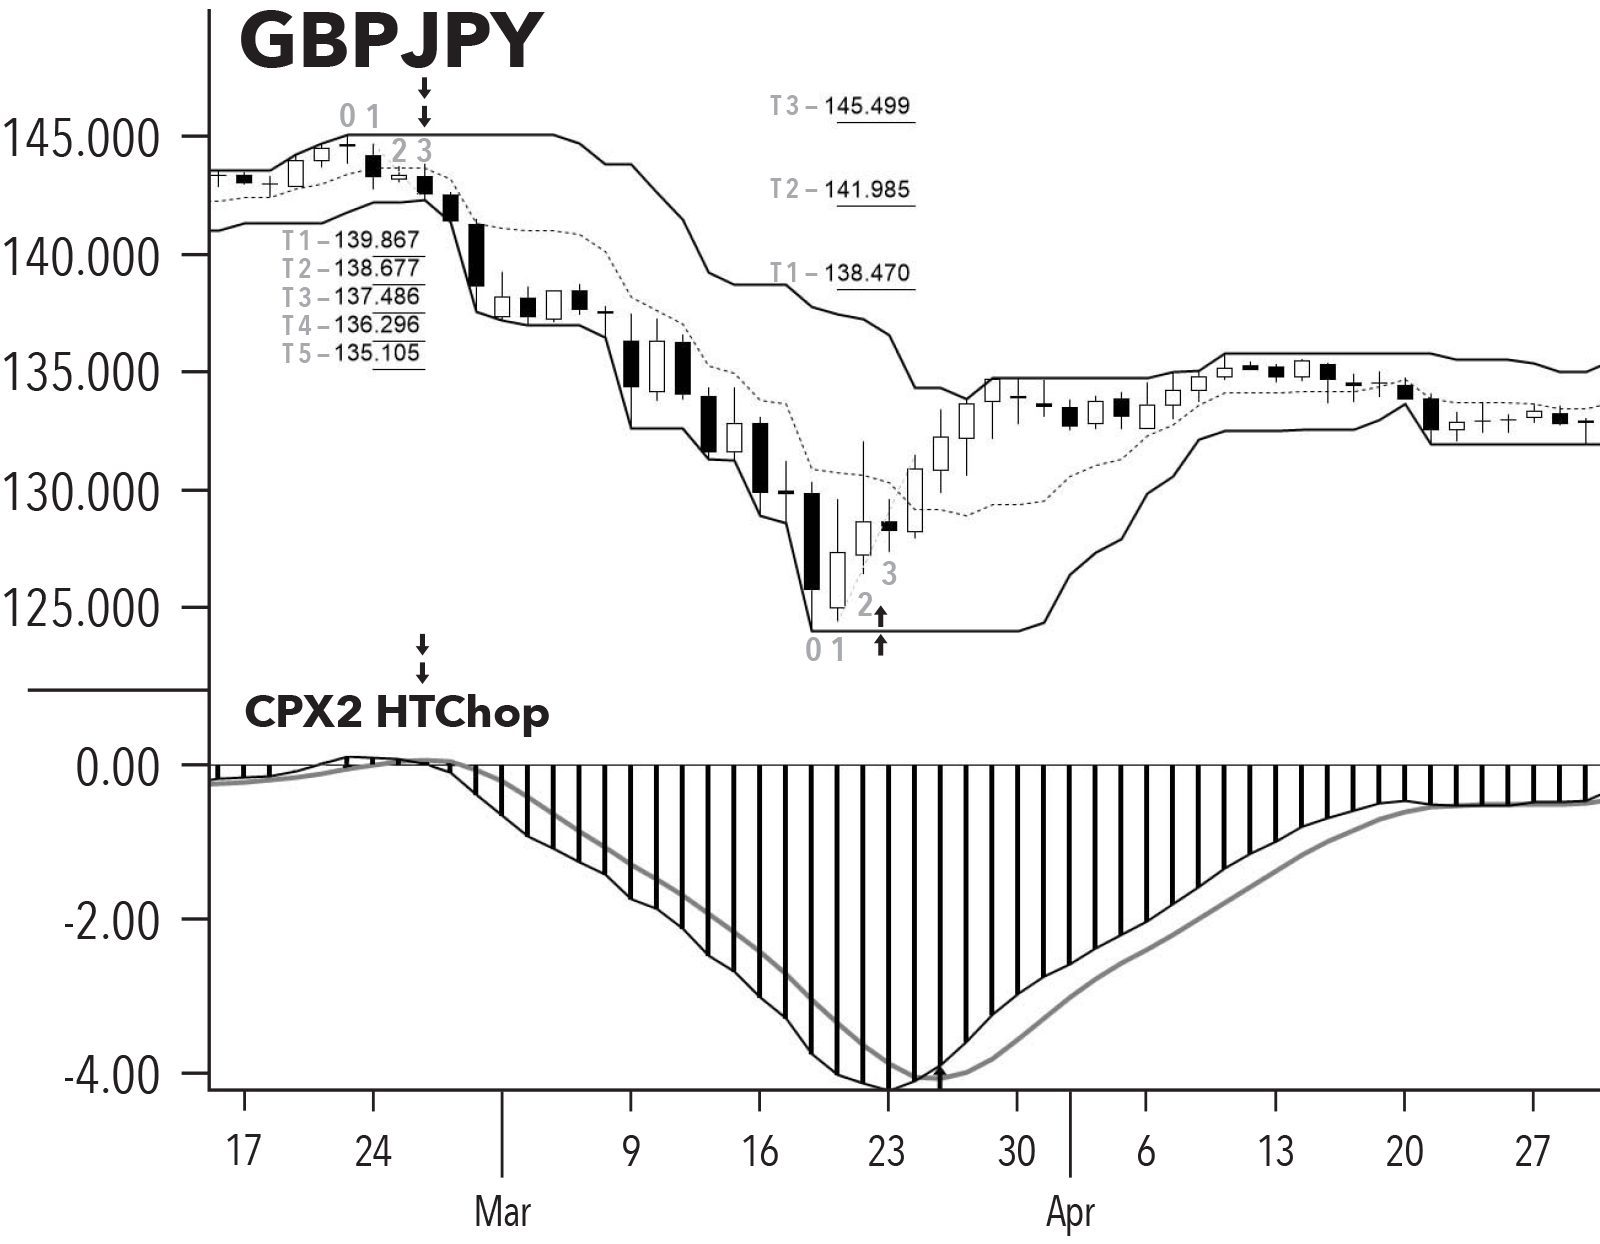
Figure 111, page 265
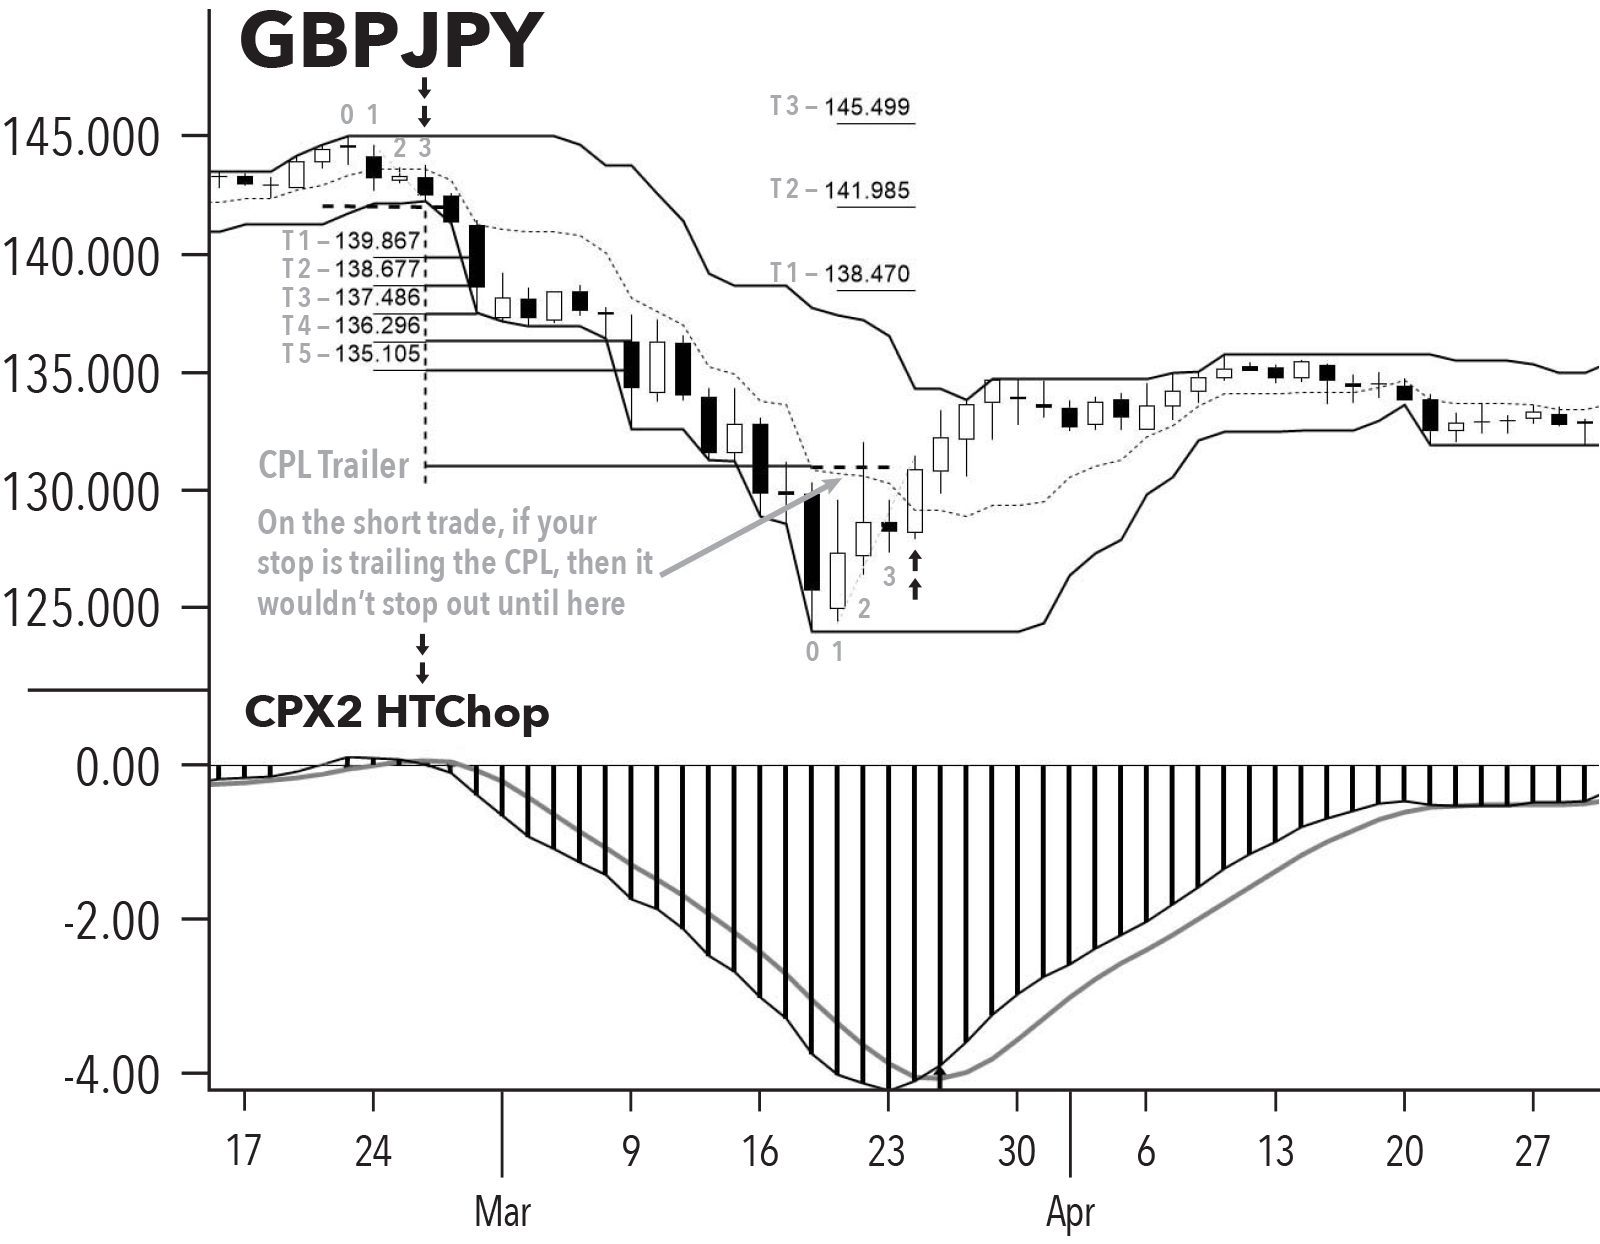
Figure 112, page 267
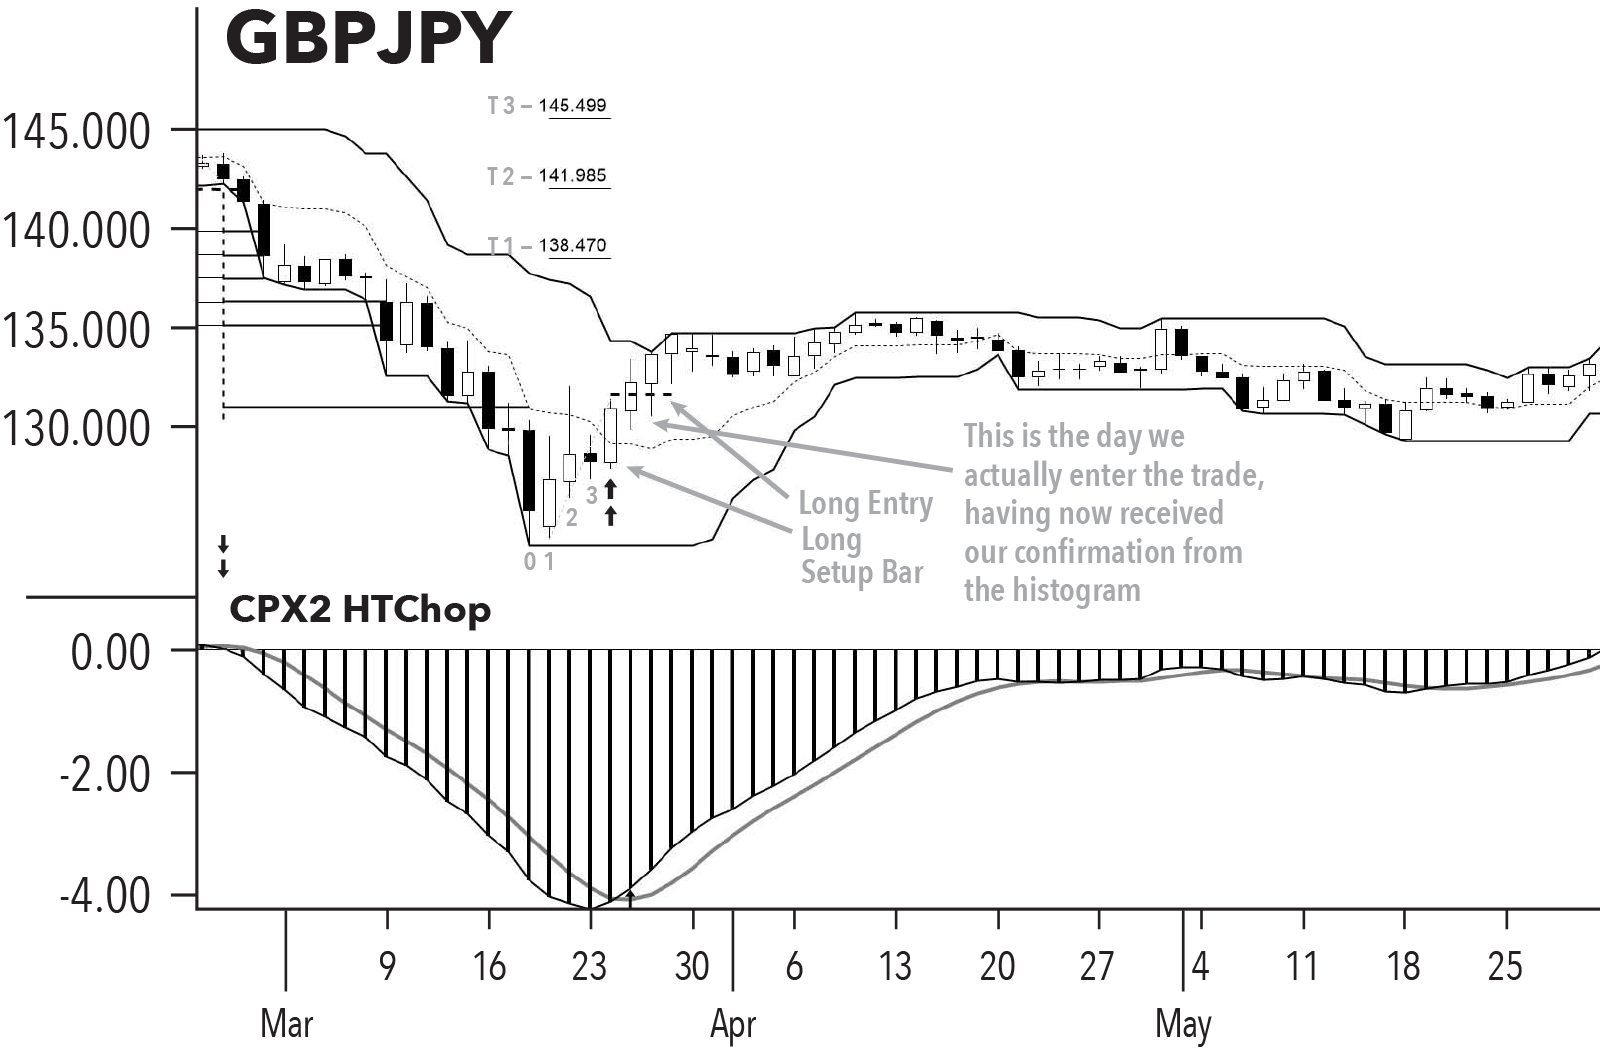
Figure 113, page 268
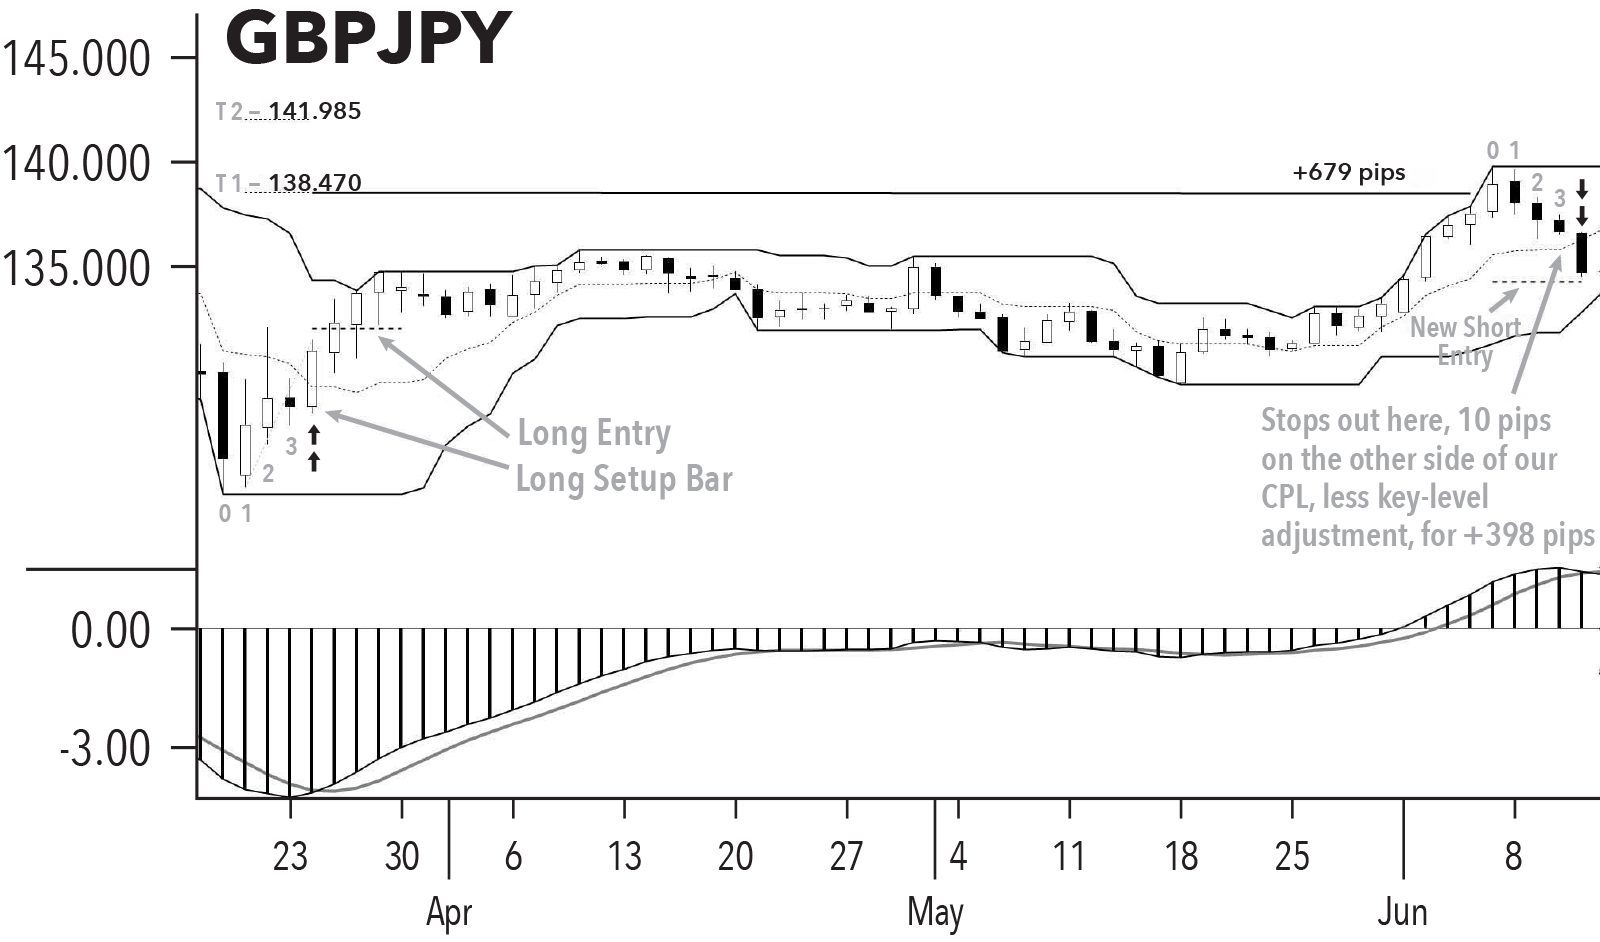
Figure 114, page 269
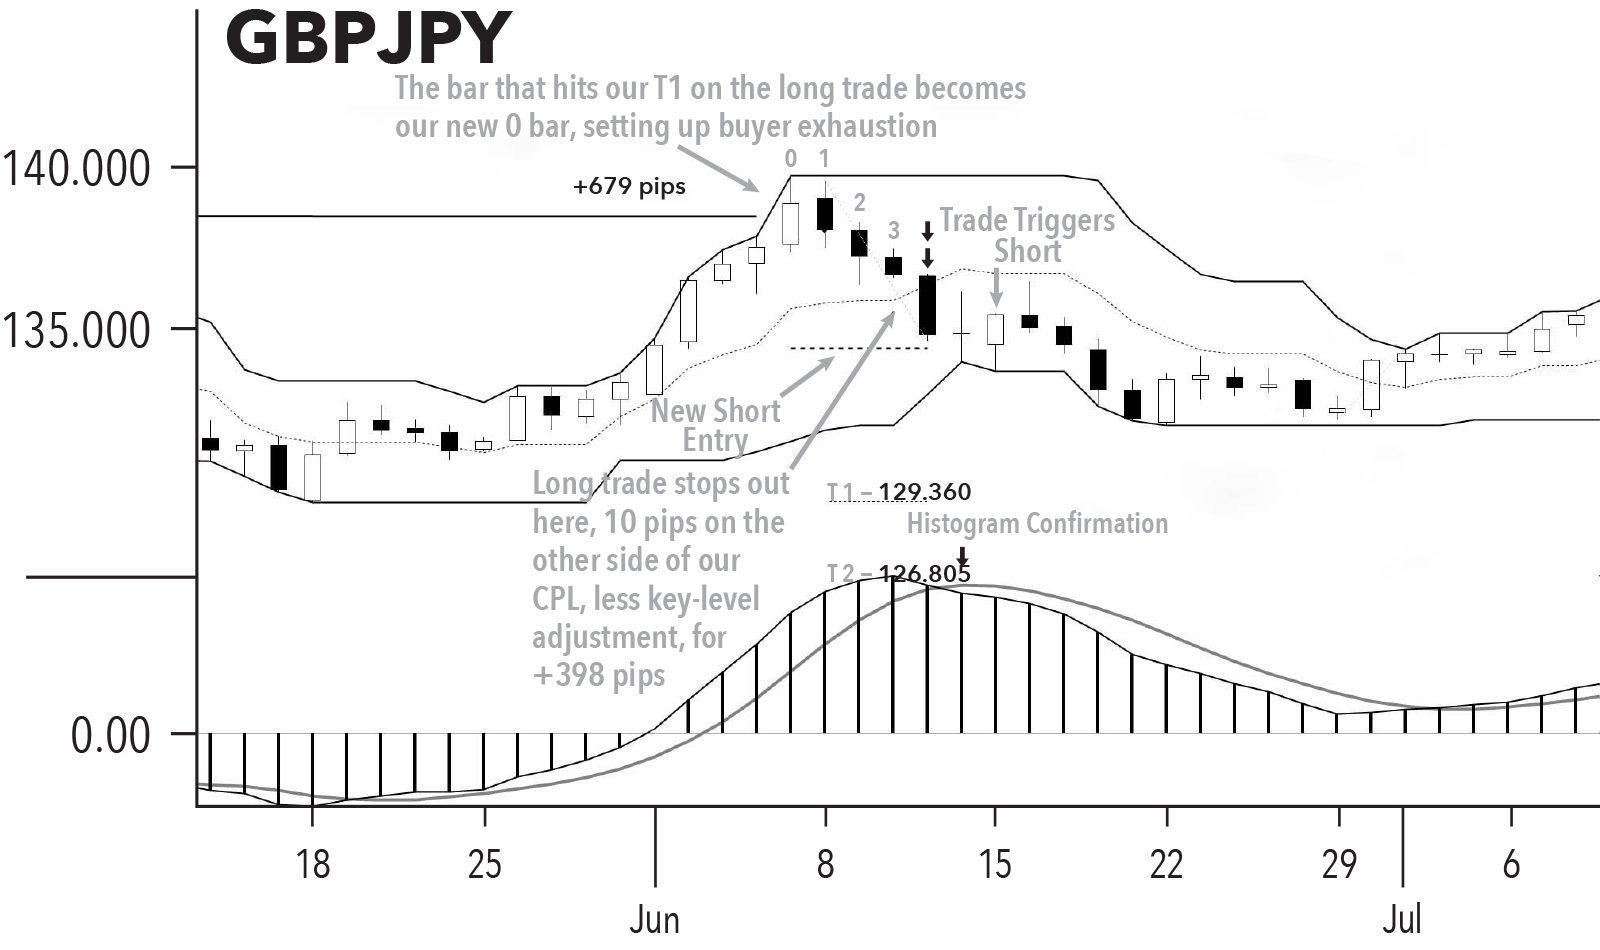
Figure 115, page 270
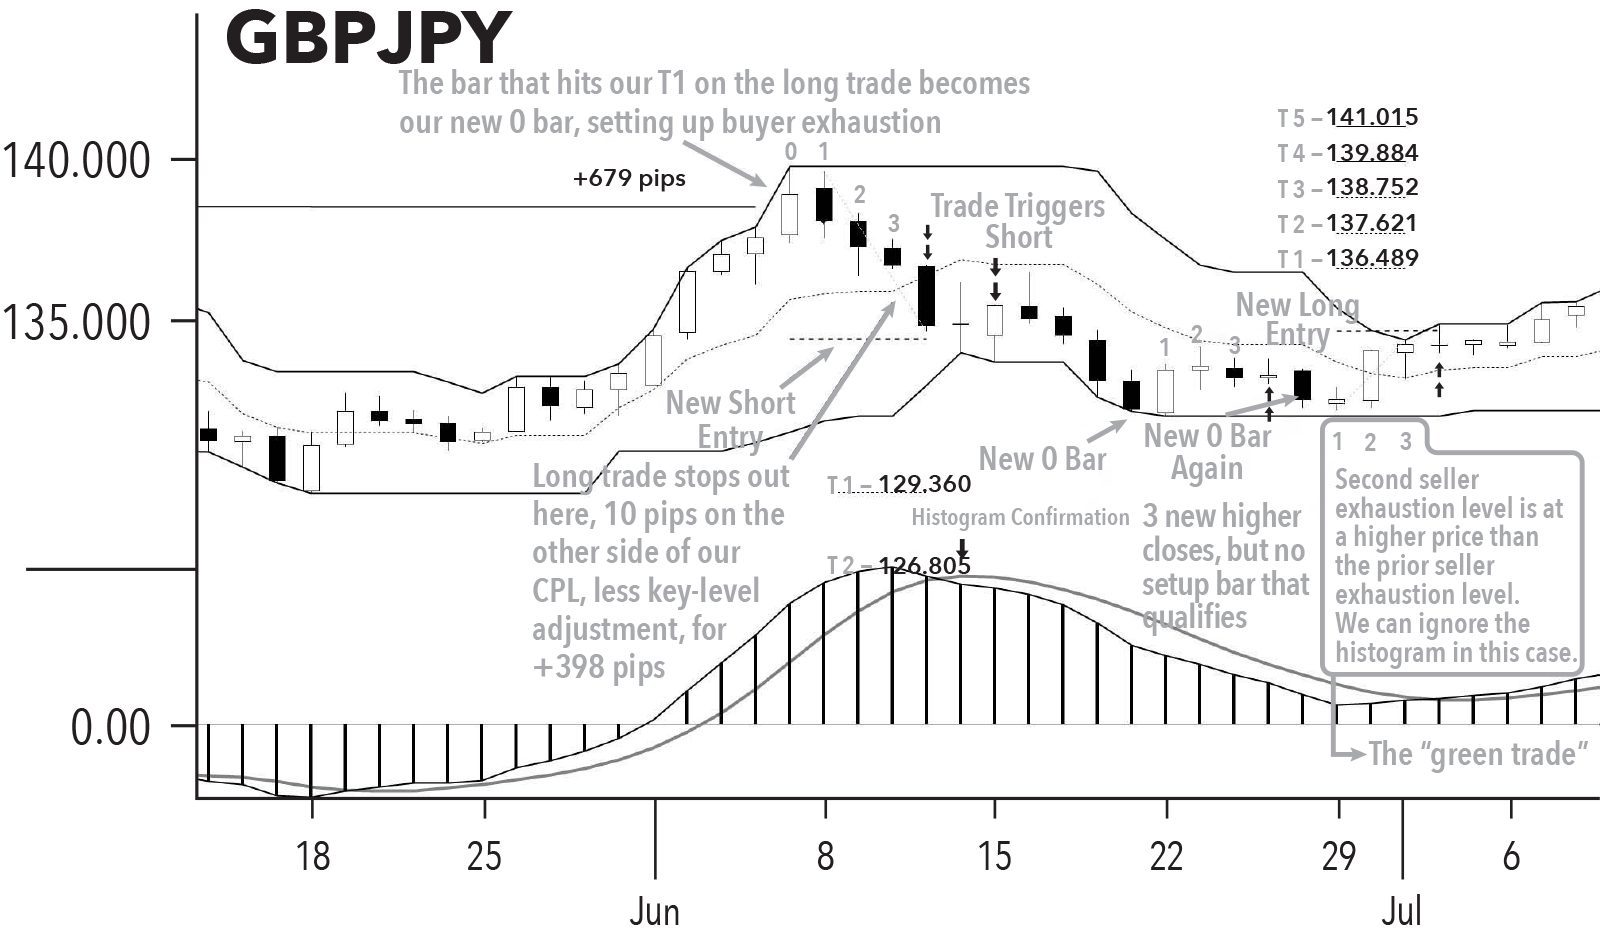
Figure 116, page 272
Figure 117, page 273